Memory pages are an easy way to add all of your photos onto one page. Like a collage, you can showcase multiple photos. However, you can add text, background colors, clip art, and more. The outcomes are endless and uniquely you! Keep reading for details on how to make and order your memory pages with Persnickety Prints from both your phone and desktop! Or, scroll to the bottom to find a walkthrough video to show you the ropes! 😉
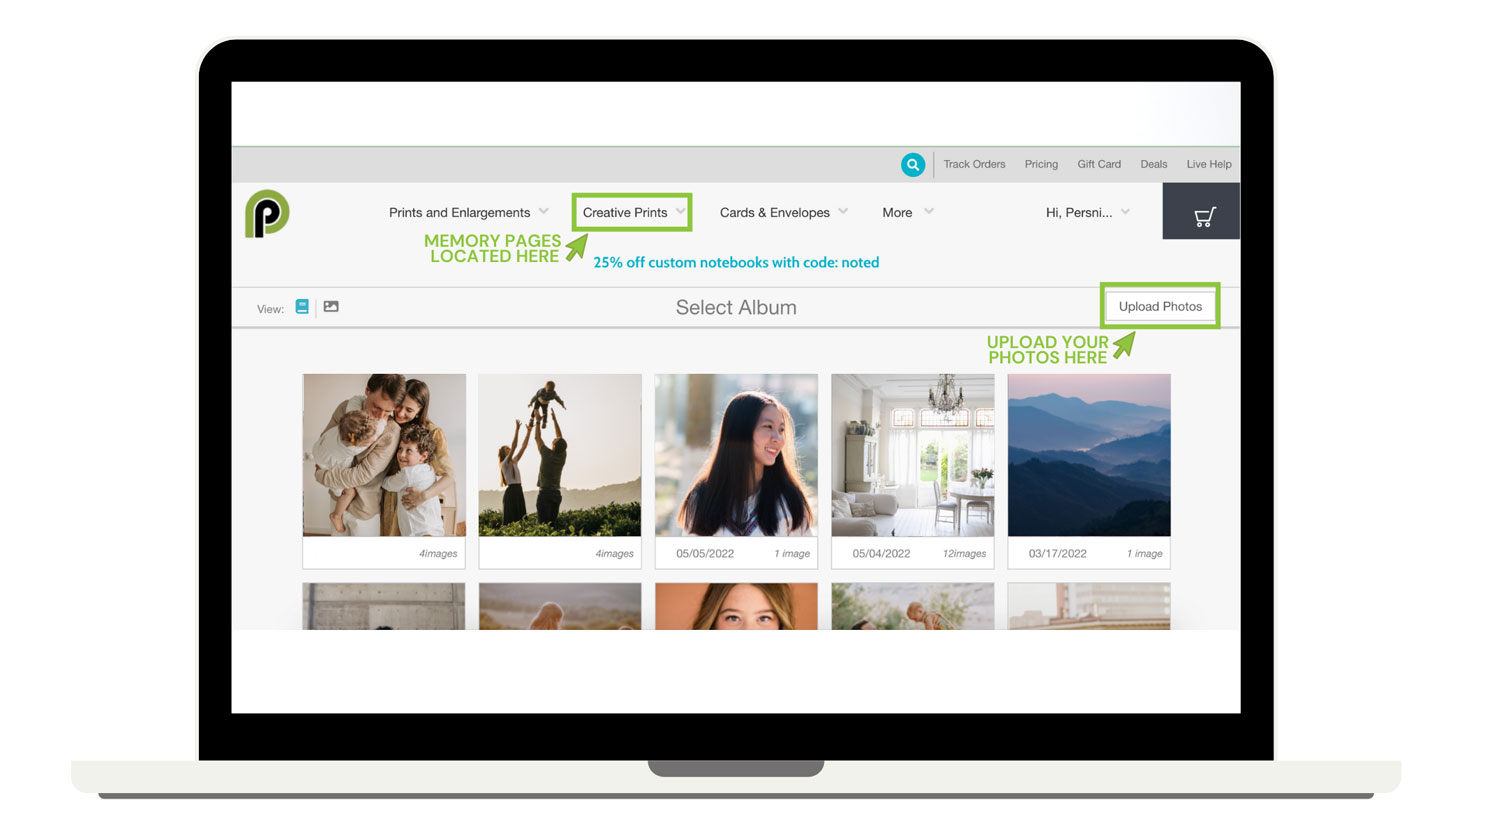
STEP 1: SIGN IN AND UPLOAD YOU PHOTOS
Sign in or sign up for your Persnickety Prints account here! Add your photos to your account by selecting UPLOAD PHOTOS. Not all customization abilities are available when creating from your phone, so we recommend that you order from your computer! However, if you choose to order your memory pages from your phone, it is the same process.
STEP 2: CREATIVE PRINTS -> MEMORY PAGES
At the top of the page, hover your mouse over the CREATIVE PRINTS and follow the drop down to MEMORY PAGES. Here you will find all of our templates for memory pages.
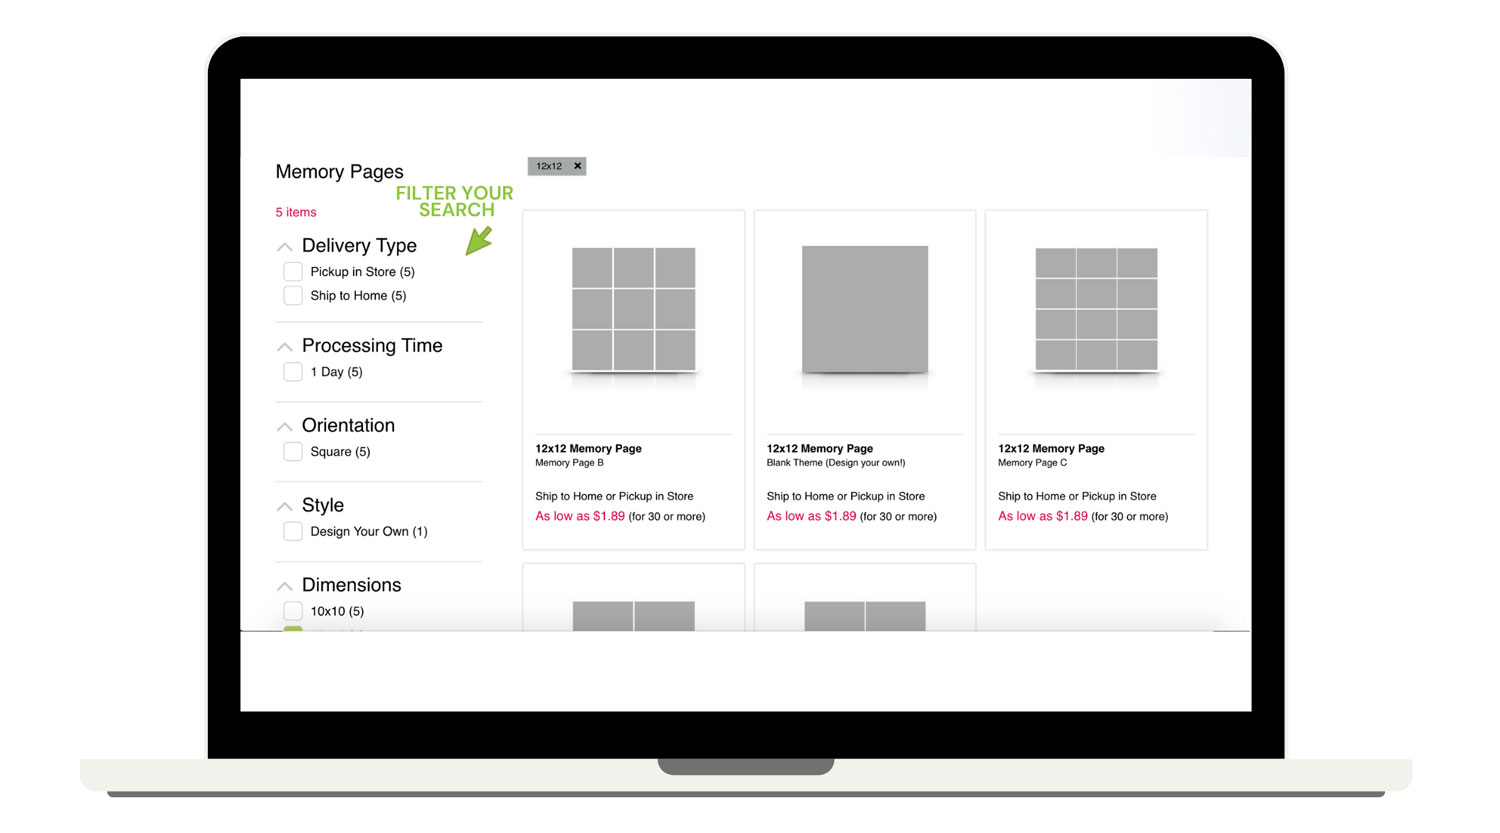
STEP 3: FILTER & SELECT THE MEMORY PAGE OF YOUR CHOICE
On the left side of the page, you can apply filters to narrow down your search to the memory page you are needing. I like to use the filter for DIMENSIONS, and selected the 12×12 option to show all of the 12″x12″ sized memory pages. Once you select your memory page template, be sure to choose the delivery, finish, and processing times that you need. Then proceed by clicking the GET STARTED button at the bottom. Keep in mind, you can delete and adjust all photo place holders to make it your own.
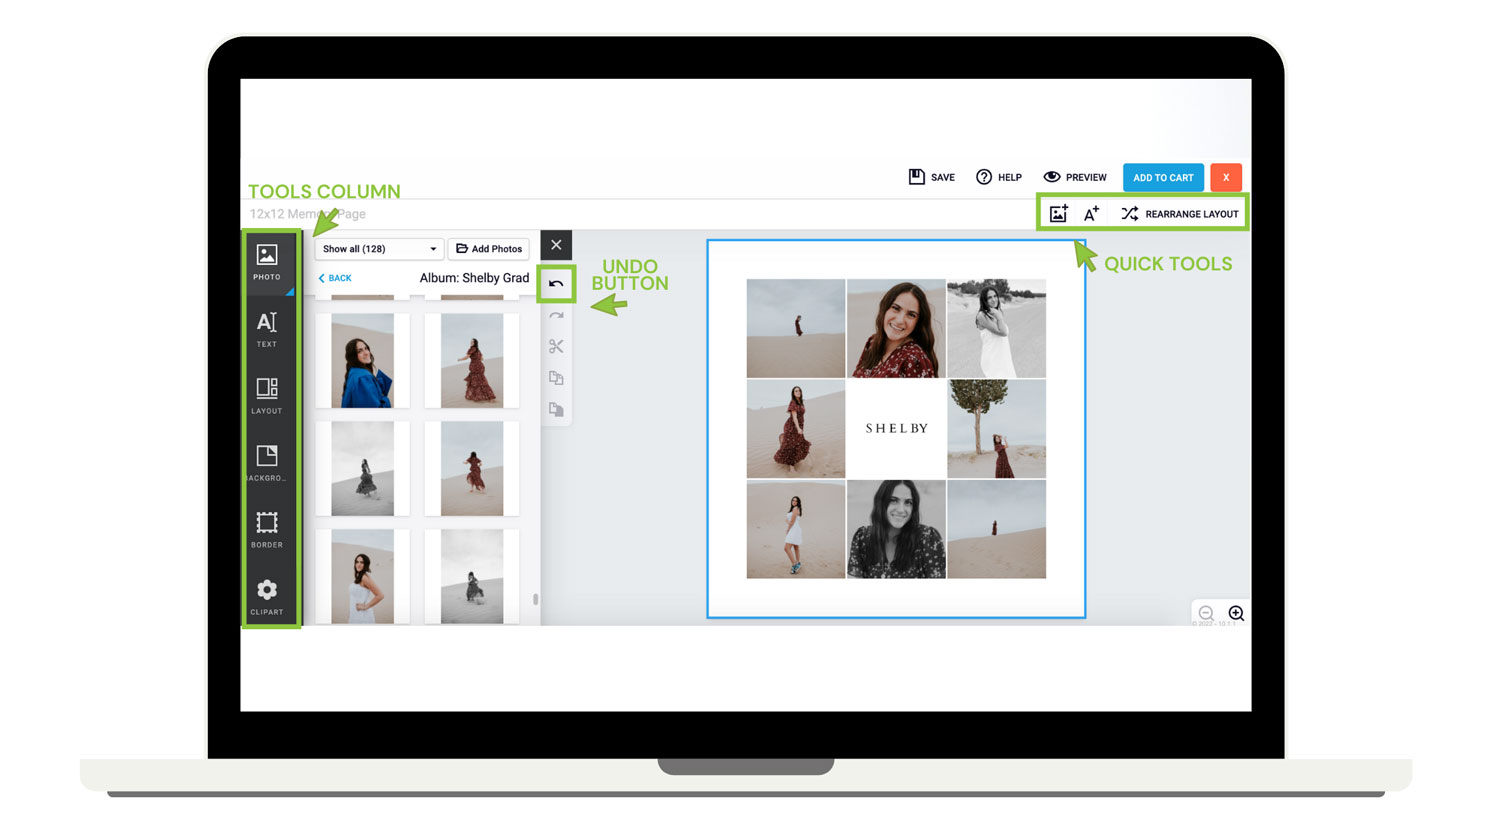
STEP 4: GET CREATIVE!
Now the fun begins! Drop your photos into your memory page. You can delete image spaces by selecting the image spot and hitting DELETE. Here you can add text* or clip art, which are both found in the tools column to the left. With text, you can change the font, size, color, and alignment when the text box is selected. You can also change the background by selecting the BACKGROUND tool, also found in the tools column on the left.
Under layouts, in the tools column, you can find more options for your memory page which are organized by the amount of photos you are wanting in your layout. Use the quick tools at the top right to make easy, fast adjustments. Add a photo, add a text box, or rearrange your layout in a new format with these options.
Make a mistake? Don’t worry, there is an “undo” button found right next to the tools column on the left.
*Note: our software is available on your phone (no app needed!) however, adding text is not an option. Be sure to use the website on a computer if you are wanting to add text!
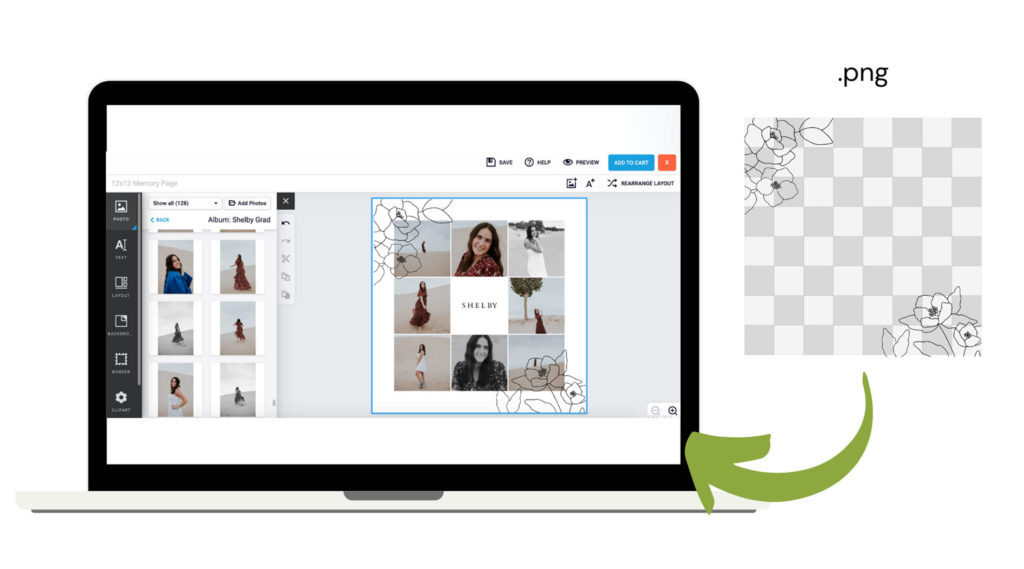
extra Tip:
Upload a decorative .png file that has a transparent background with your photos, and use it as a fun overlay for your memory pages! Check it out –>
Or, use one of ours! We have many .png overlay options located in the CLIP ART section in the left tools column! These are fun for adding a little extra something to your memory page!
STEP 5: ORDER YOUR MEMORY PAGE
When you’re done creating your memory page, hit ADD TO CART and check out*! It’s seriously that easy and so much fun. There are endless ways to make a memory page unique and beautiful! They are great for framing, journaling, scrapbooking, or even as a personal gift!
*Note: Print credits can not be used to purchase memory pages.
Congrats! You made it through! Celebrate with one memory page, on us ! Even better, we are including a code for when you make more!
Use Code: MEMORY For One Free Memory Page!
codes can not be combined with other offers | offer valid for one per customer
Walk Through
We absolutely can not wait to see what you create! Share your memory page on social media and tag us!