Prints
Cards
Gifts
Wedding
Explore
Scrapbooking with the Collect App
Hi Friends! It’s crazy to think that the first time I introduced the Collect Photo App was in 2013! 6 YEARS AGO. How time flies…
My 2019 Family Album
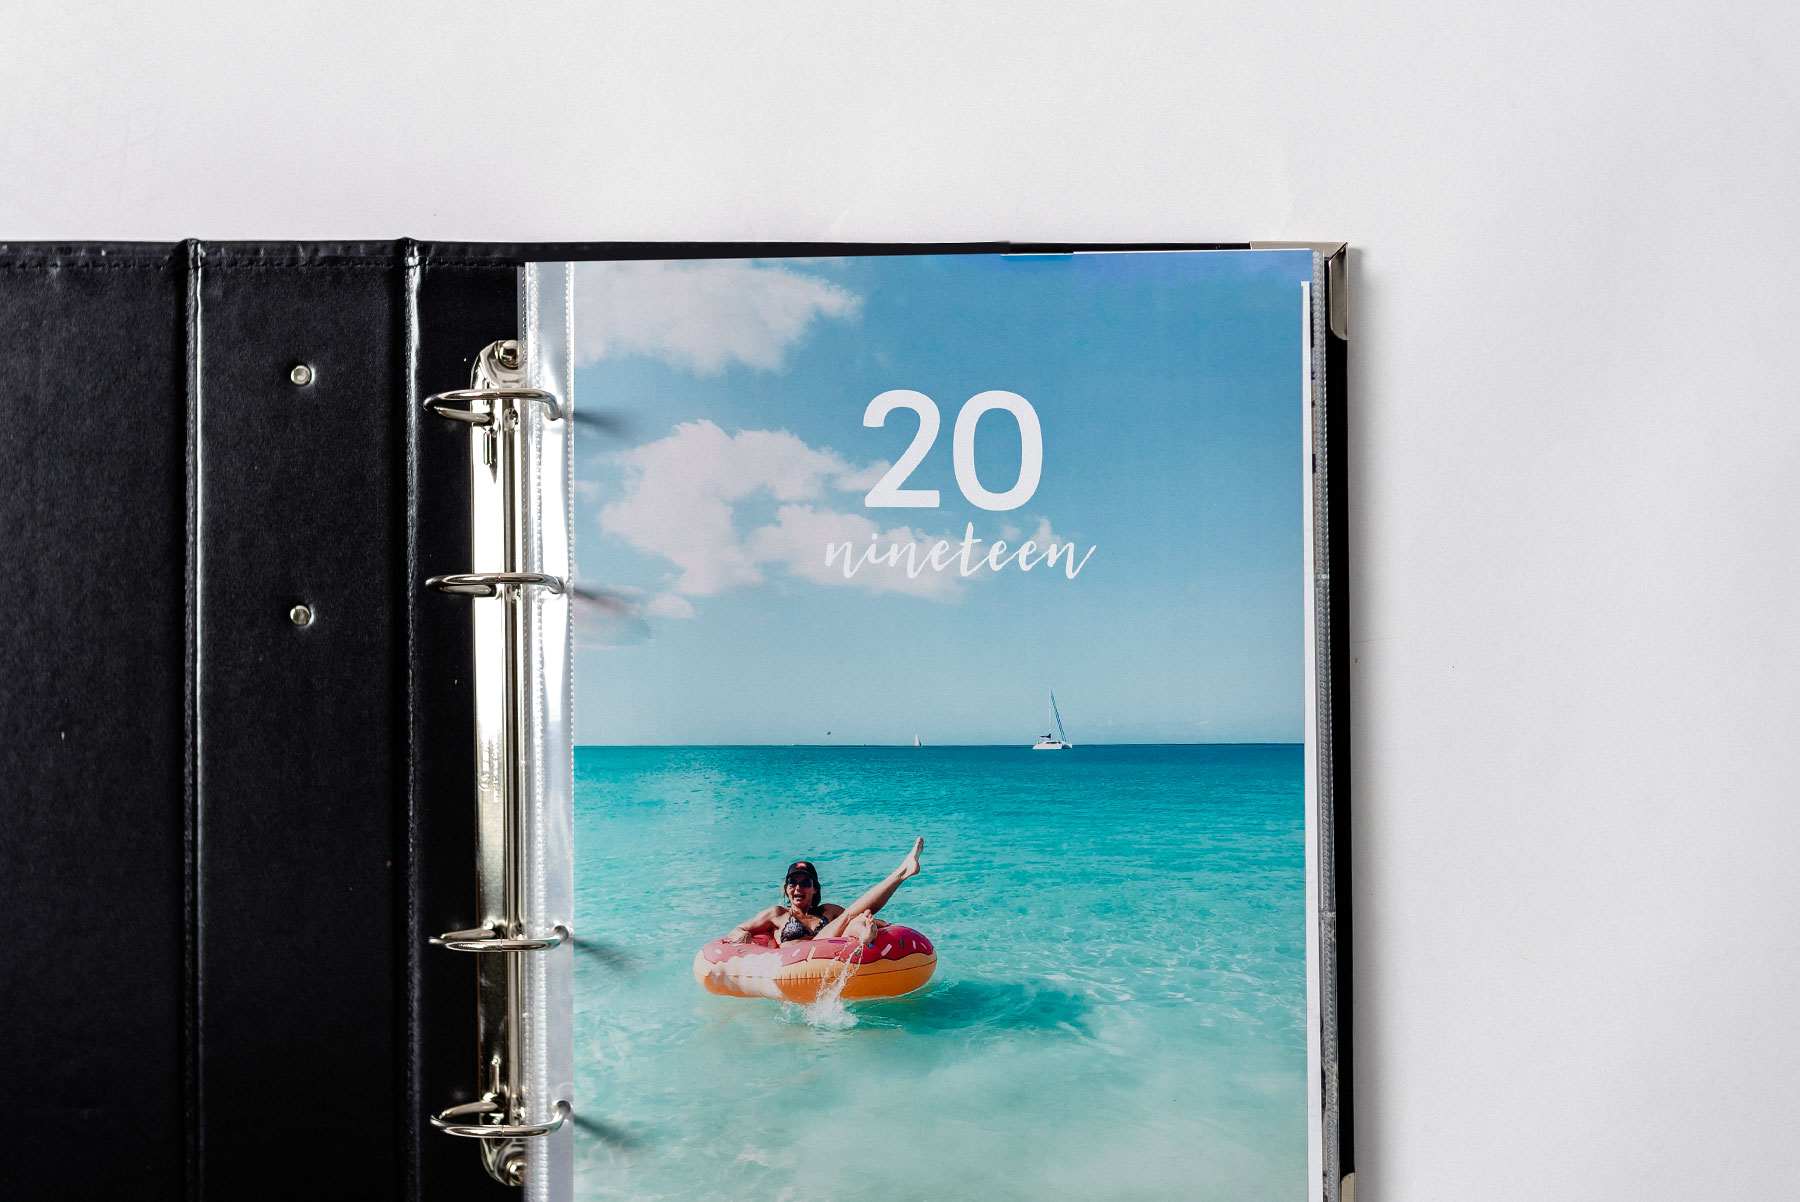
Every year I keep a 12×12 family photo album highlighting our family. This year I wanted to try something a little different, the new 9×12″ album from Studio Calico.
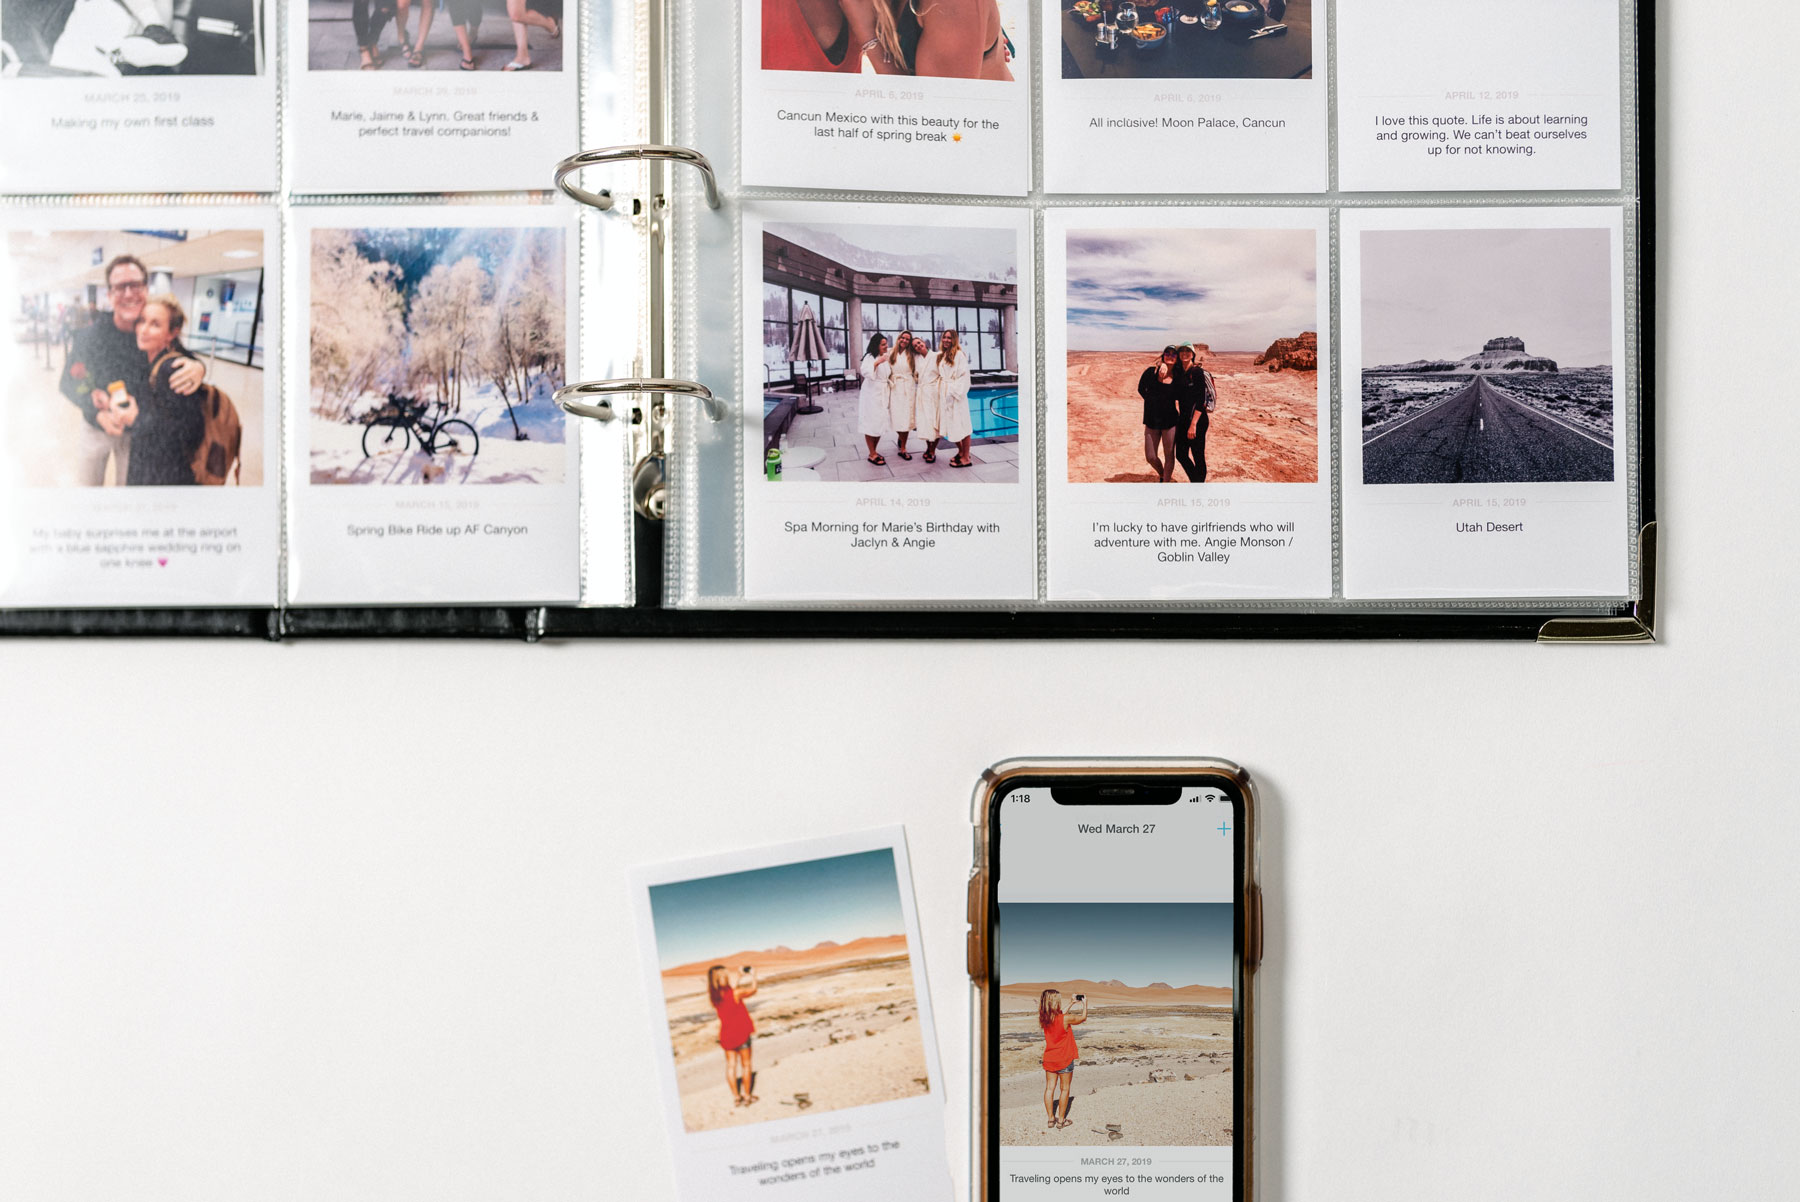
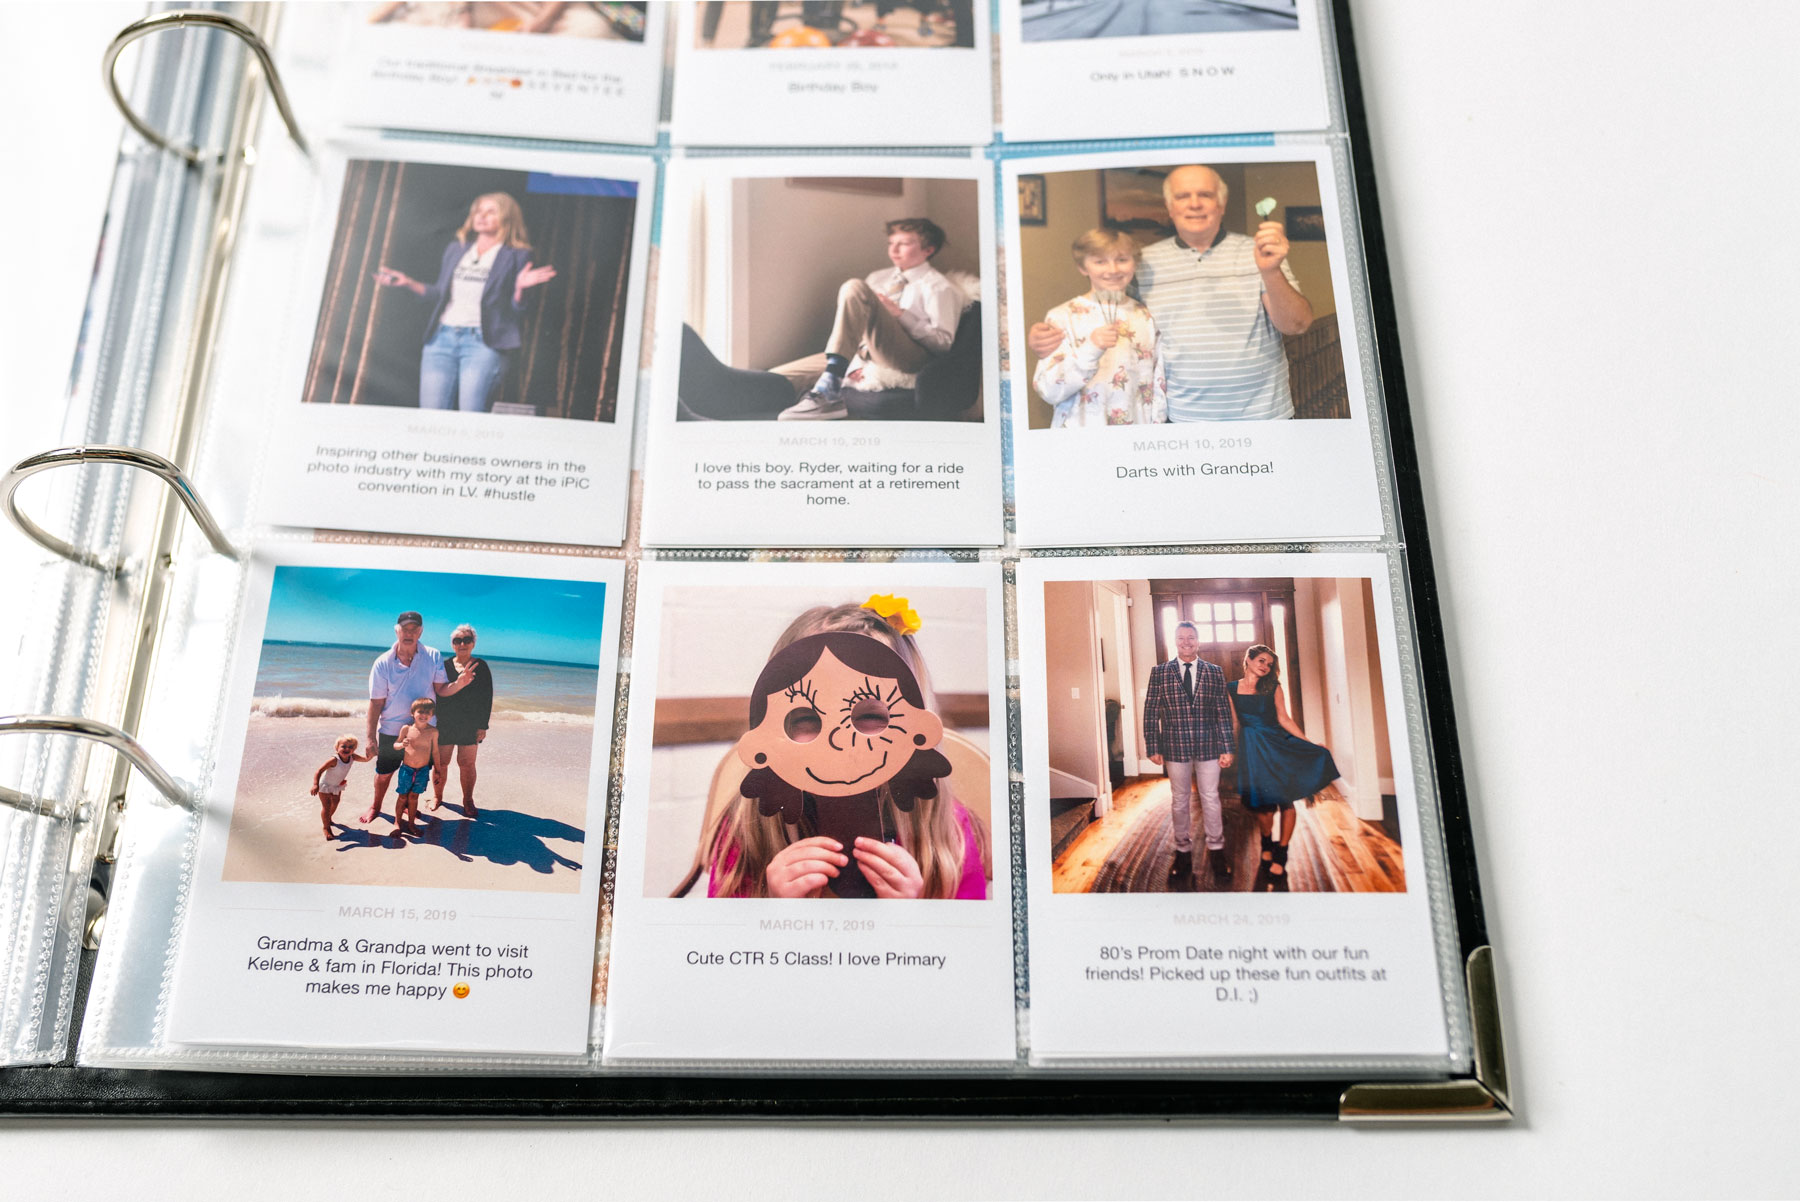
This 9×12 album includes 9×12″ photo pockets, 3×4″, and a 3×4″ / 4×6″ mix. I decided that I would use the Collect App this year to highlight our family’s top 18 moments each month. These 18 moments would then fill a front and back 3×4″ pocket page.
In addition to the top 18 photos for the month, I’ll use the 9×12″ pages to separate them with my favorites photos ($1.99 each 9×12 print). There are always some months with more photos, for January 2019 I created a 9×12 collage (try Picframe or Rhonna Collage on your phone) for this pocket.
Keep in mind, 99% of these photos are taken with my iPhone and they look amazing! Be sure to lighten and edit your photos to get a little pop in the prints. I have oodles of tutorials here on the blog and a FREE 6 week mobile photo self paced course if you need a little help.
Instagram and Facebook photos are OK in the 3×4 collect app prints, but any larger and they will print pixelated. Here’s my lecture on why you should not be using Facebook as photo storage > 😉
Why the Collect App
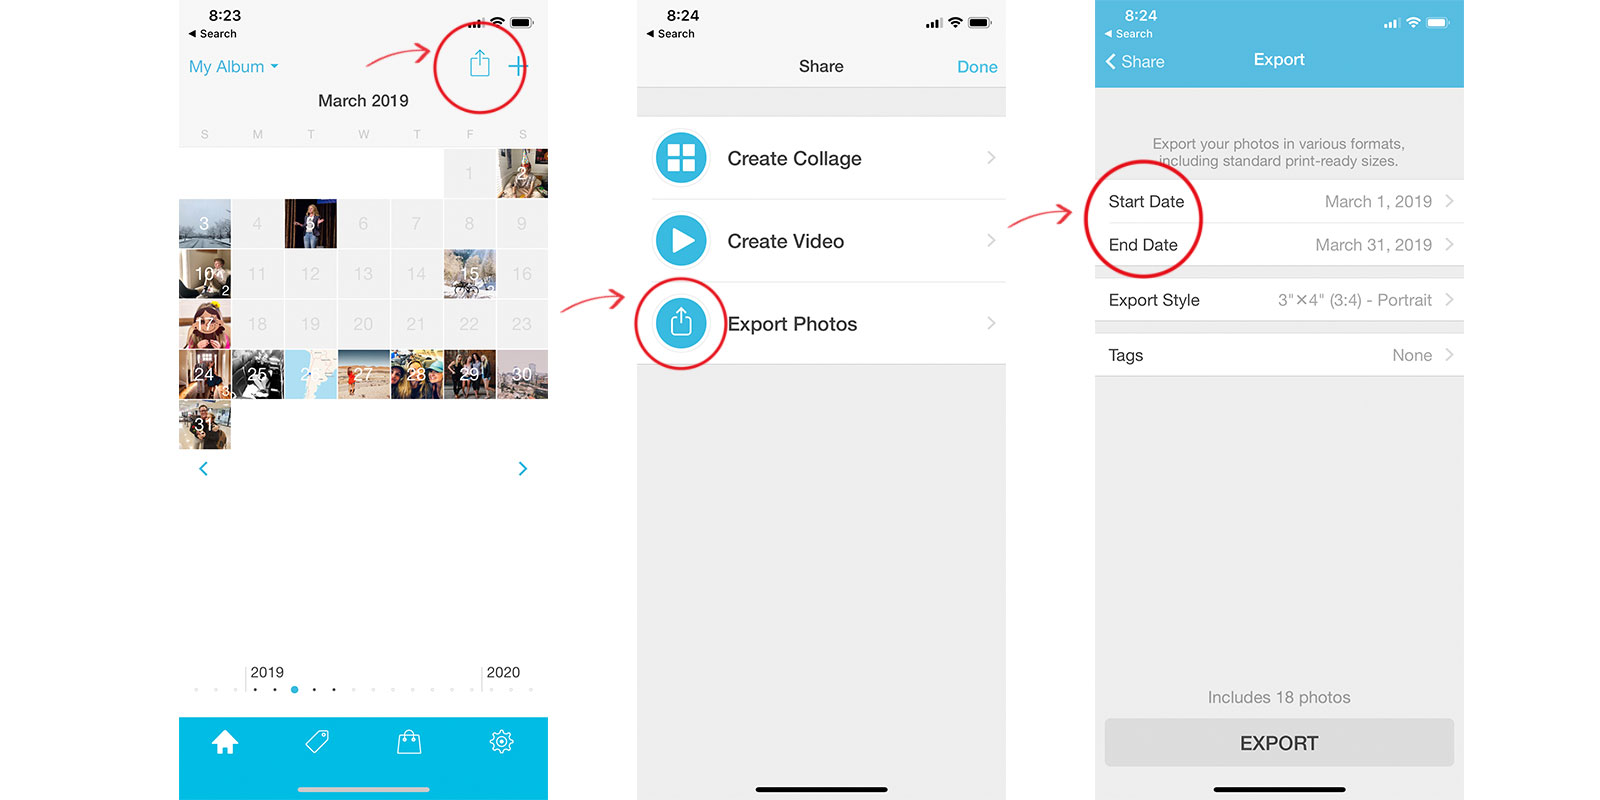
The Collect App makes it easy to journal a few notes underneath a Polaroid style image and print 3×4 for pocket style memory keeping. There are 2 ways to export the final card from the app, and this is important to remember so stay with me here. The correct way, and the incorrect way:)
1. You must use the paid version of the app. It’s $2.99?. Cheaper than your morning coffee or a gallon of gas.
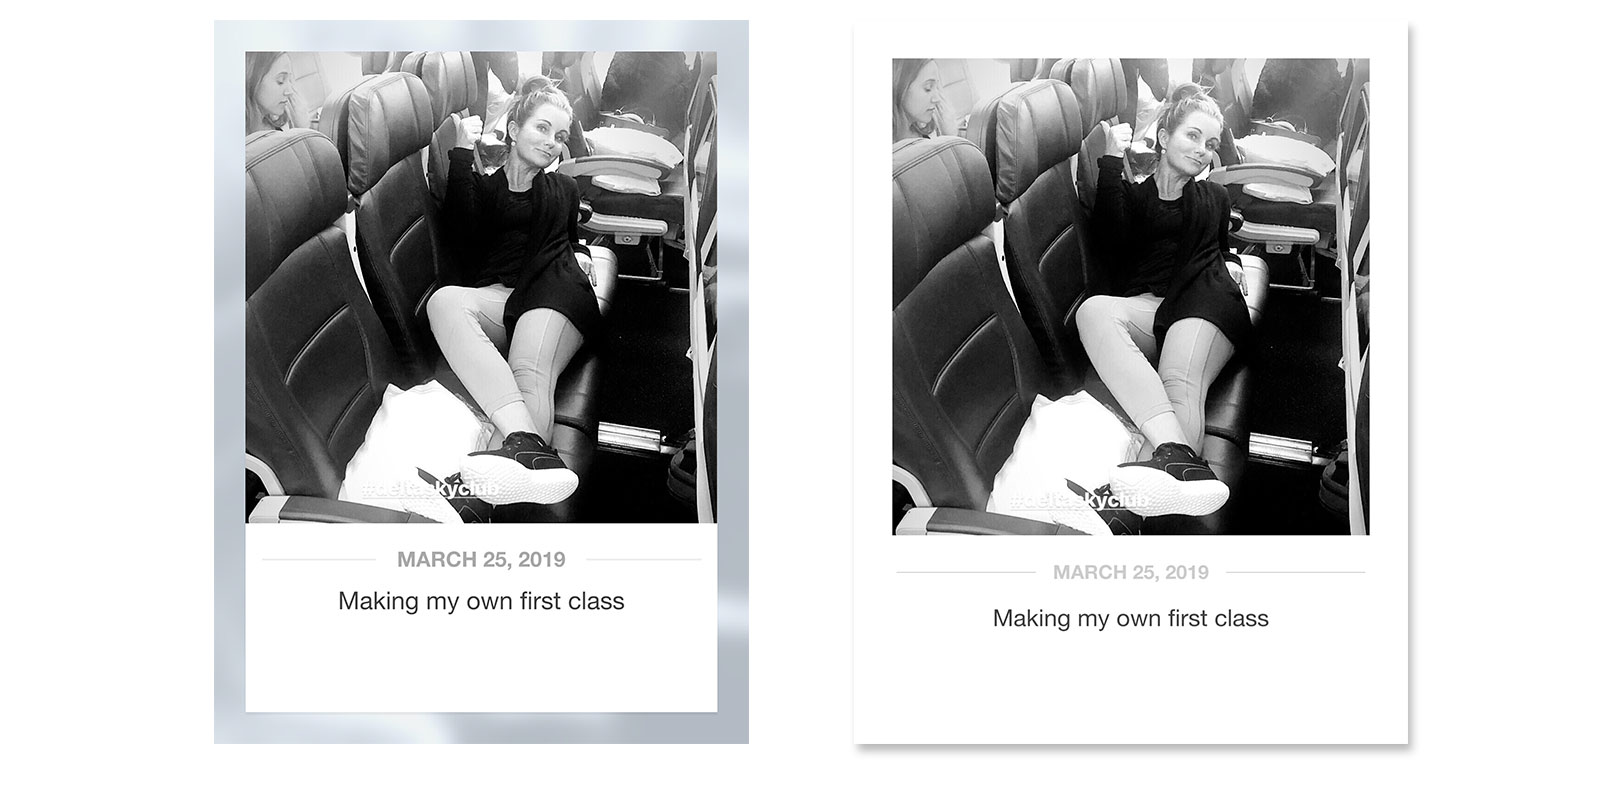
2. The paid app AND bulk export is the only way to print the cards with a clean white border. Otherwise, you’ll get this yucky gray border…
3. Single card export (even with the paid version) will also have the gray border.
Inside My 2019 Album


Collect App Tips
- I have learned to create all 18 cards each month and then export the entire month at once.
- If you miss a card and have to go back, you’ll need to bulk export again. However, here’s a little tip, when exporting, you can change the date range. Change the range to reflect the one card, rather than exporting the whole month again. You’ll see what I mean once you get going.
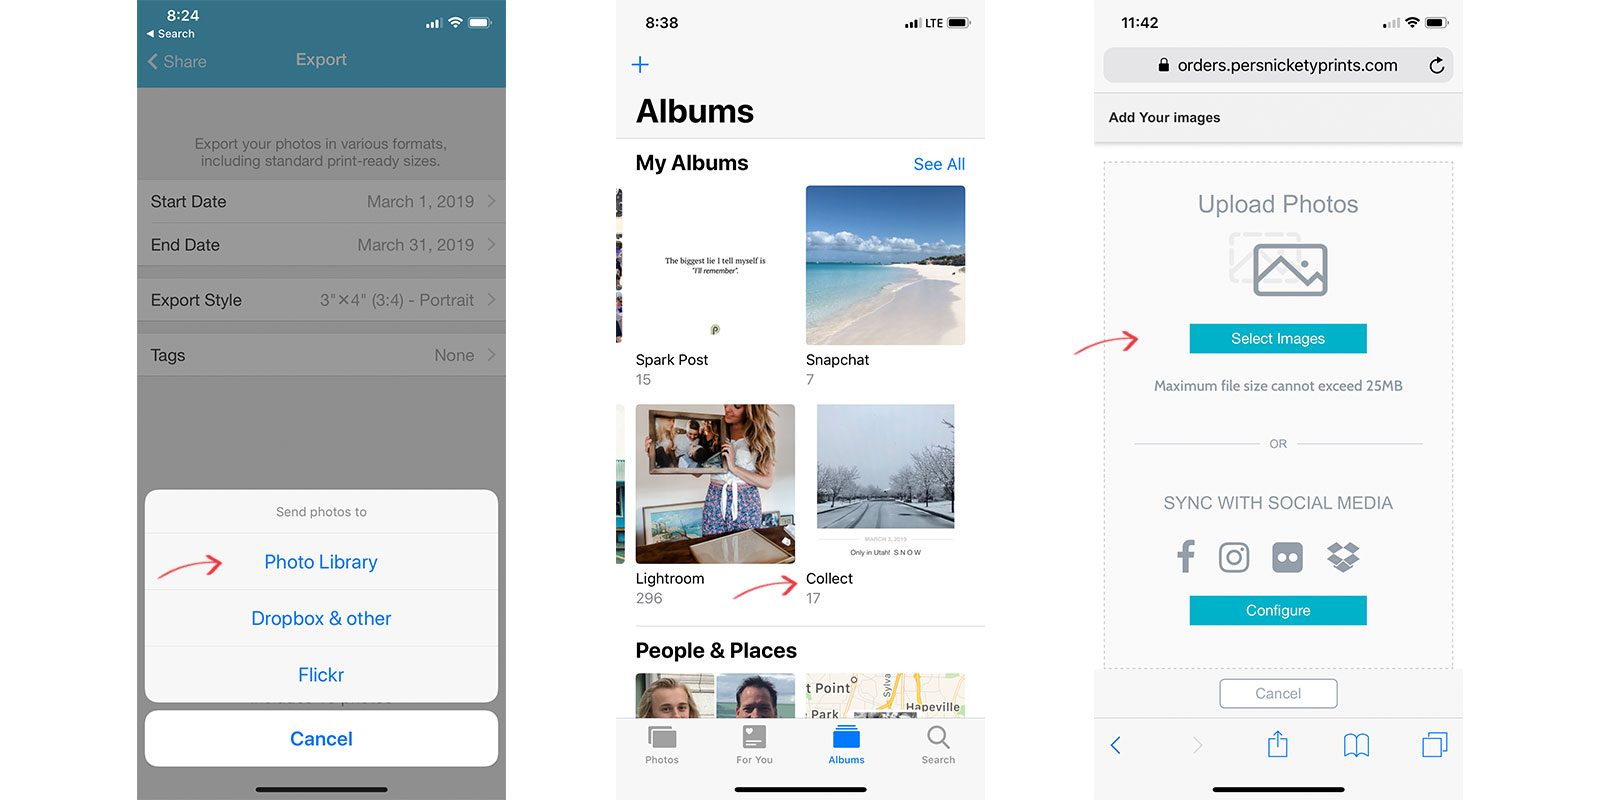
You can export the Collect App cards to your camera roll (or dropbox) and then simply upload and order prints, all right on your phone.
Save the bulk export to your Photo Library. Your phone should create a photo album titled “Collect”. Open your browser (or click here) to upload. Scroll down and find the Collect Album, select all images > upload > order prints > photographic prints >3×4 > matte (my personal preference) > add “1” for one of each and checkout! Wait for your prints to arrive and simply slide them into your album to enjoy for generations to come!
I hope this inspires you to find a system that works and free those photos from your device!
