
Hello, my name is Carson and I’m an amateur mom-tographer (that’s a word, right?) and an avid scrapbooker. I’m currently a member of the Studio Calico creative team, which means that I get to play with their beautiful kits on a monthly basis, and really, there isn’t much that makes me happier, except for those kiddos pictured above. I recently decided to stop printing the bulk of my photos at home and I began using the awesome services here at Persnickety Prints. It took a shift in mindset to plan ahead for multiple projects, but when the prints arrived, their quality and ease of use, more than made up for that extra bit of brain drain on the front end. I edited a number of photos on my desktop and then sent them over to be printed on their matte cardstock in the 4×4 and 4×6 sizes with the white border. I love the quality of the prints and the fact that I don’t have to wrestle with my printer and trimmer just to get my pictures ready to scrap. Persnickety’s turnaround time was crazy fast, just a couple of days, and now I have a good sized stack of photos just waiting to be scrapped. I’m not sure why I didn’t make this change sooner. With my pictures prepped and ready to go, I got right down to creating with Studio Calico’s October Story Board kits. I love the colors and patterns in the kits this month and I’d love to share how this particular layout came together using all those lovely bits and pieces.
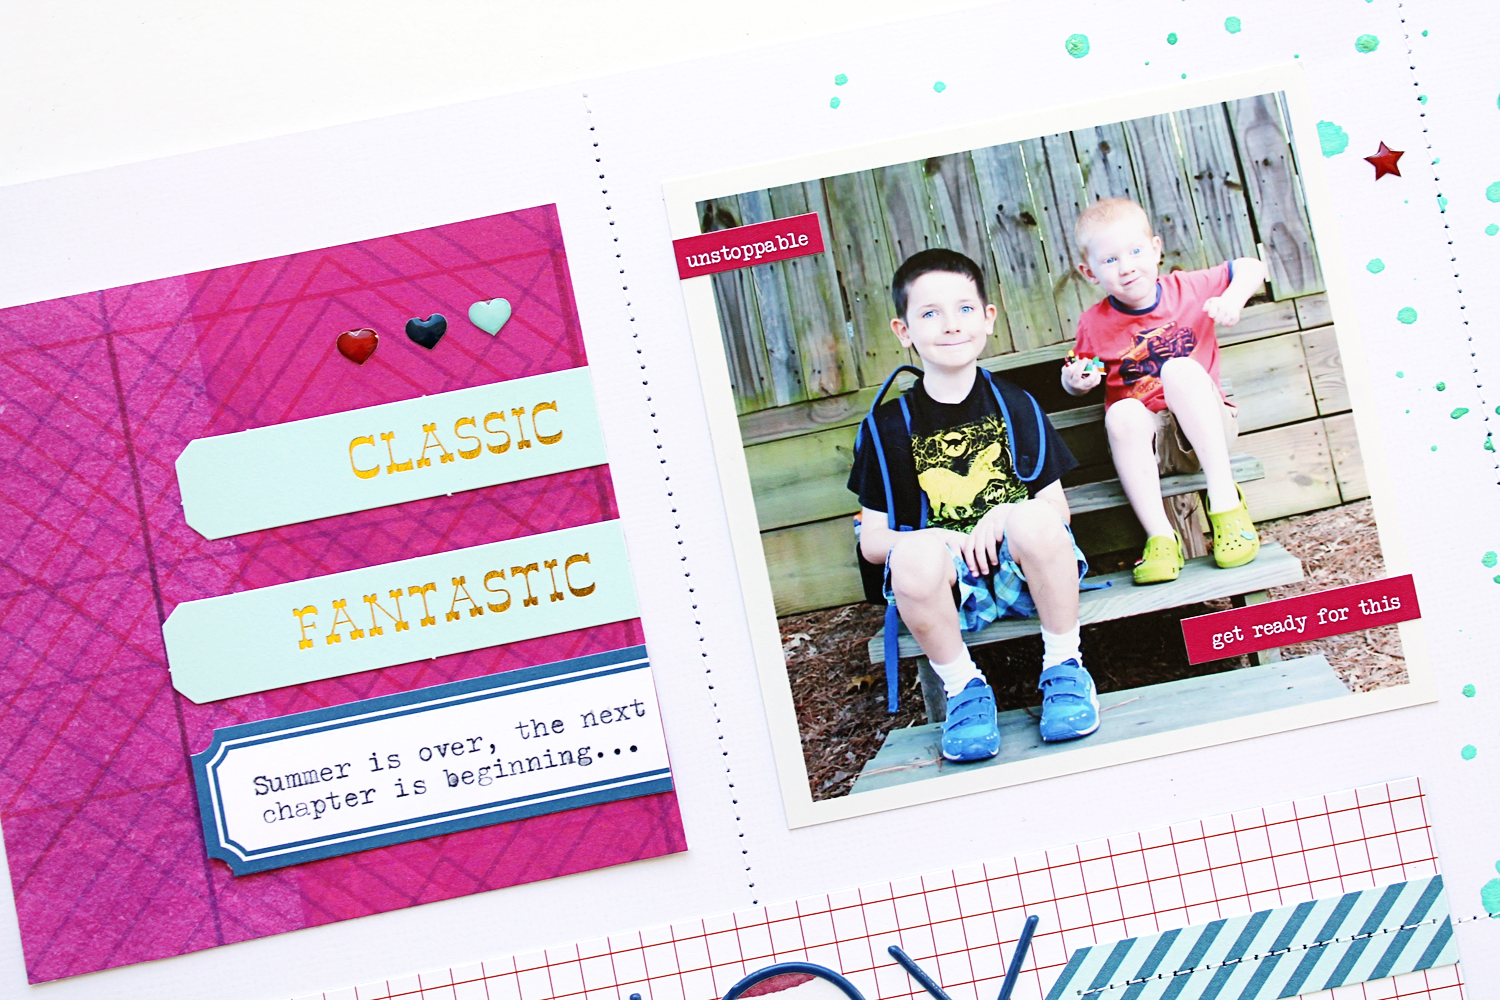
I knew I wanted to scrap these almost identical photos of my boys, waiting for the bus on their first day of school in a grid style layout. I began by matching the photos to a number of the beautiful papers from the kit. I cut the chosen papers down to 4×4 and started moving them around the page until I found a configuration that made me happy. I had used quite a few of the papers already and was able to use some left over scraps to create this page. Grid layouts are an excellent way to kill a kit!

I liked the idea of having the title span the width of the grid so I added a longer rectangle piece between the four squares and created a very concise title, which I accentuated with patterned paper darts to help it pop off the page.
And finally, because white space makes me supremely uncomfortable, I decided to add some texture to the background by stitching around the grid and then add interest by splattering some mist behind the photos. There is something just so cathartic about splattering paint across a white canvas, if you haven’t done it, I recommend you try it.
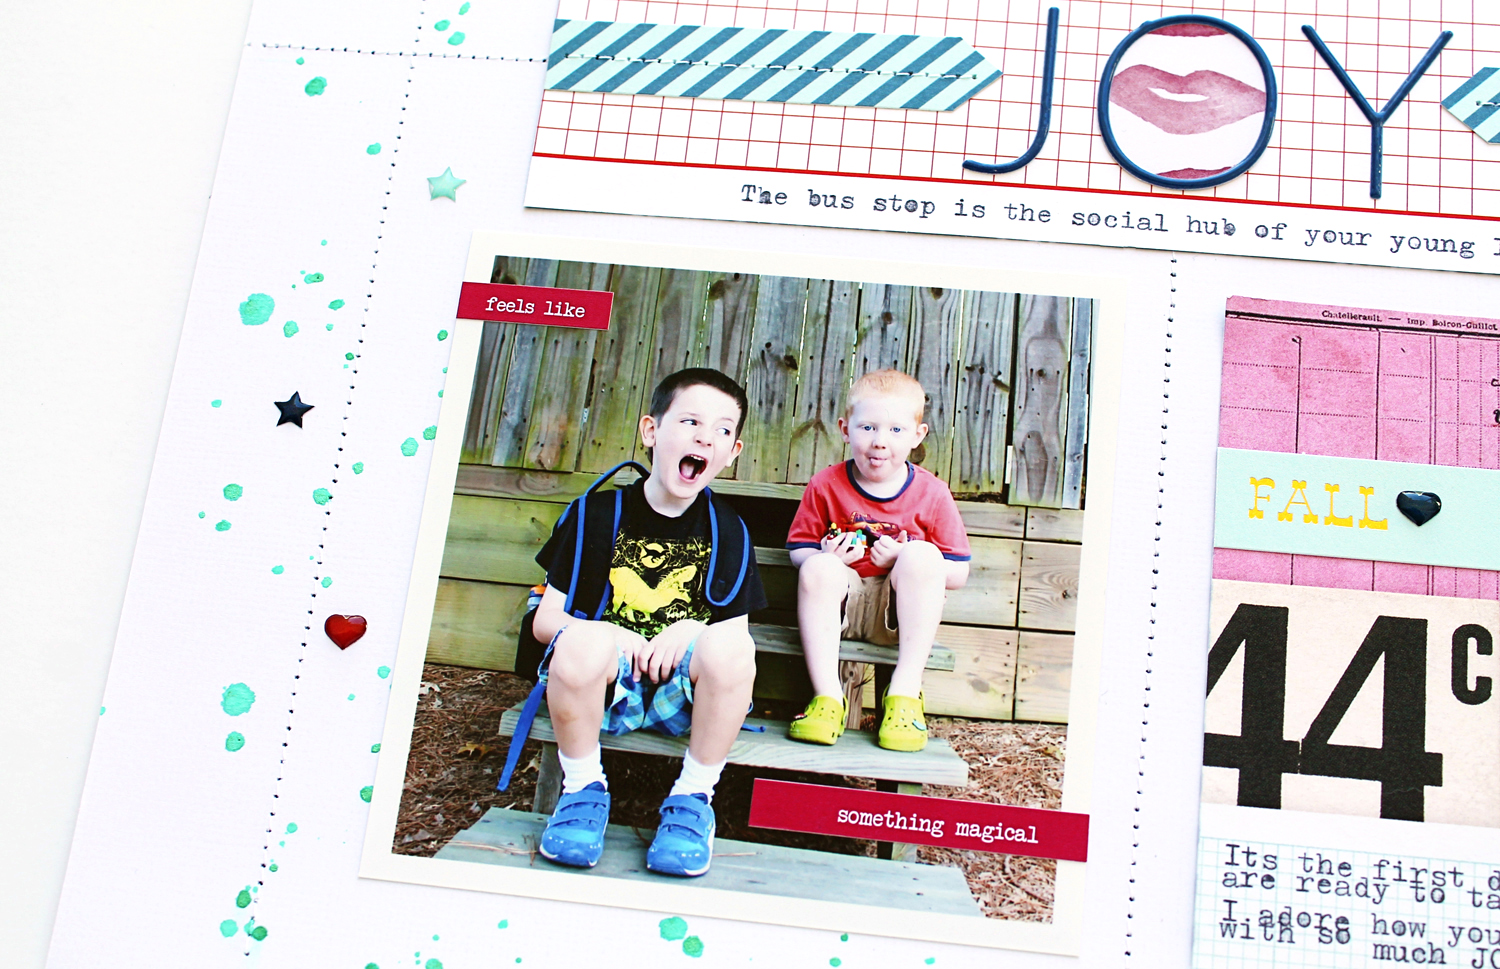
One unexpected bonus of working in a grid format, is that I could type my journaling directly onto the grid pieces before permanently adhering them to the page. I love the way the typed journaling looks almost as if it is part of the patterned paper. I had a little too much fun with it and added journaling in three different places!
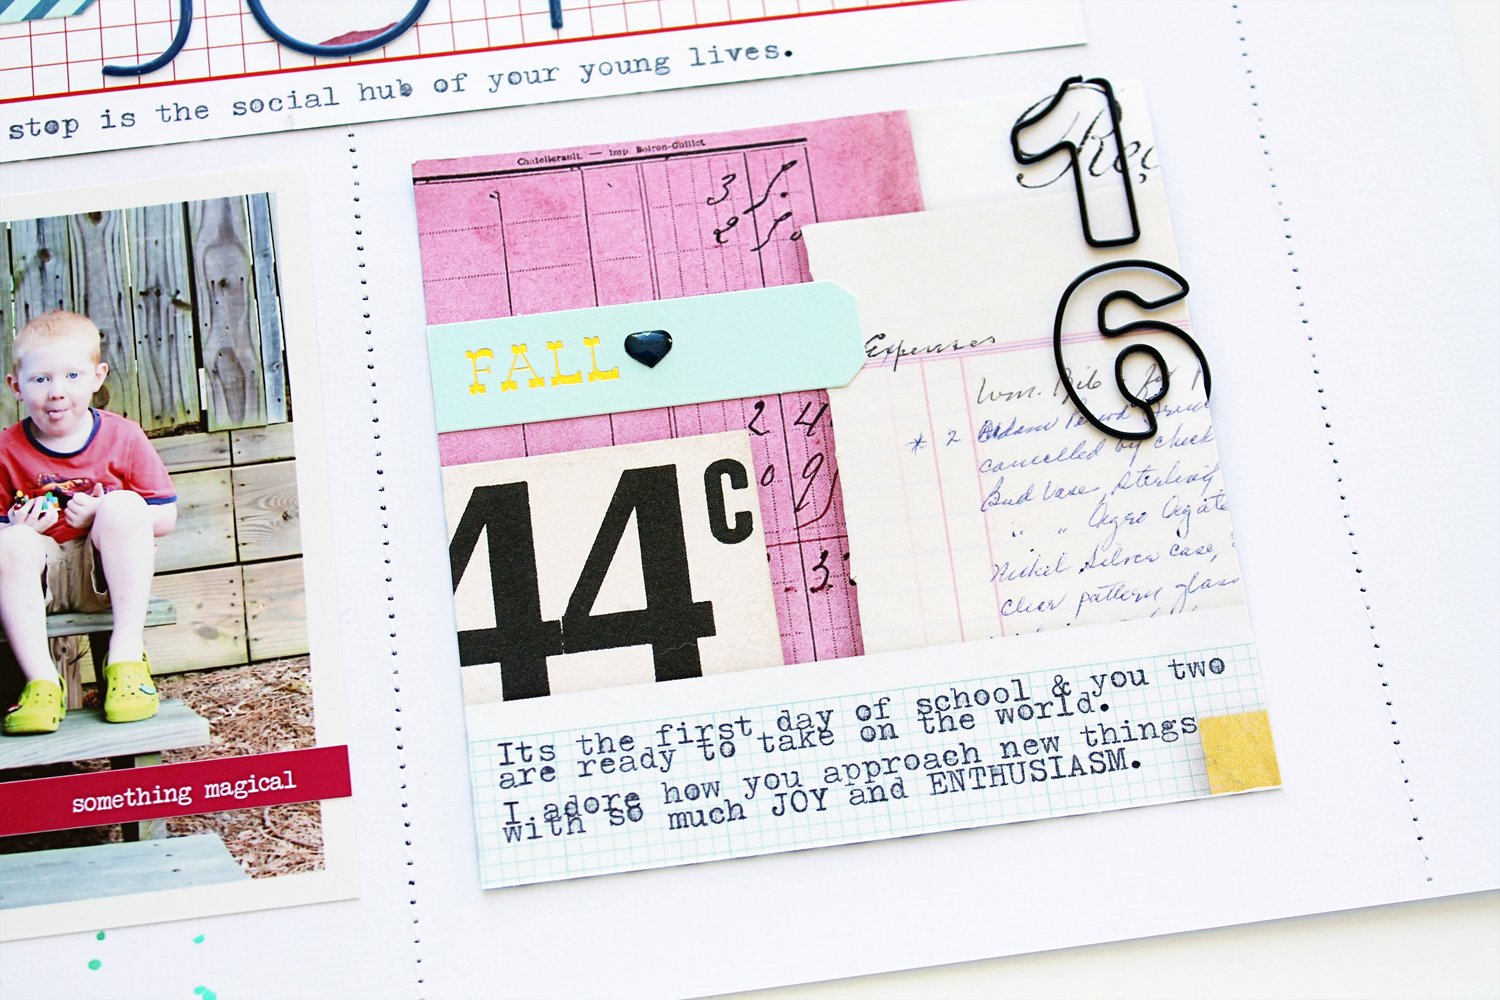
My favorite part of a layout is adding all the lovely embellishments as I go, and the Story Board kit sure has some lovely embellishments; those paper clips (that’s a 9 by the way as I had already used the 6), those gold foil labels and of course my forever favorites, the beautiful red phrase stickers. All the little touches are so fun to scatter around a page and add so much depth to the finished layout.

Thanks so much for stopping by today. I can’t wait to see what you create with precious photos and memories.
Carson