Start living your best life, intentionally
If you’ve landed here without reading the post: A Digital Vision Board can Change Your Life or this post: Get Started with a Vision Board check them out first and then come back here for the final steps …
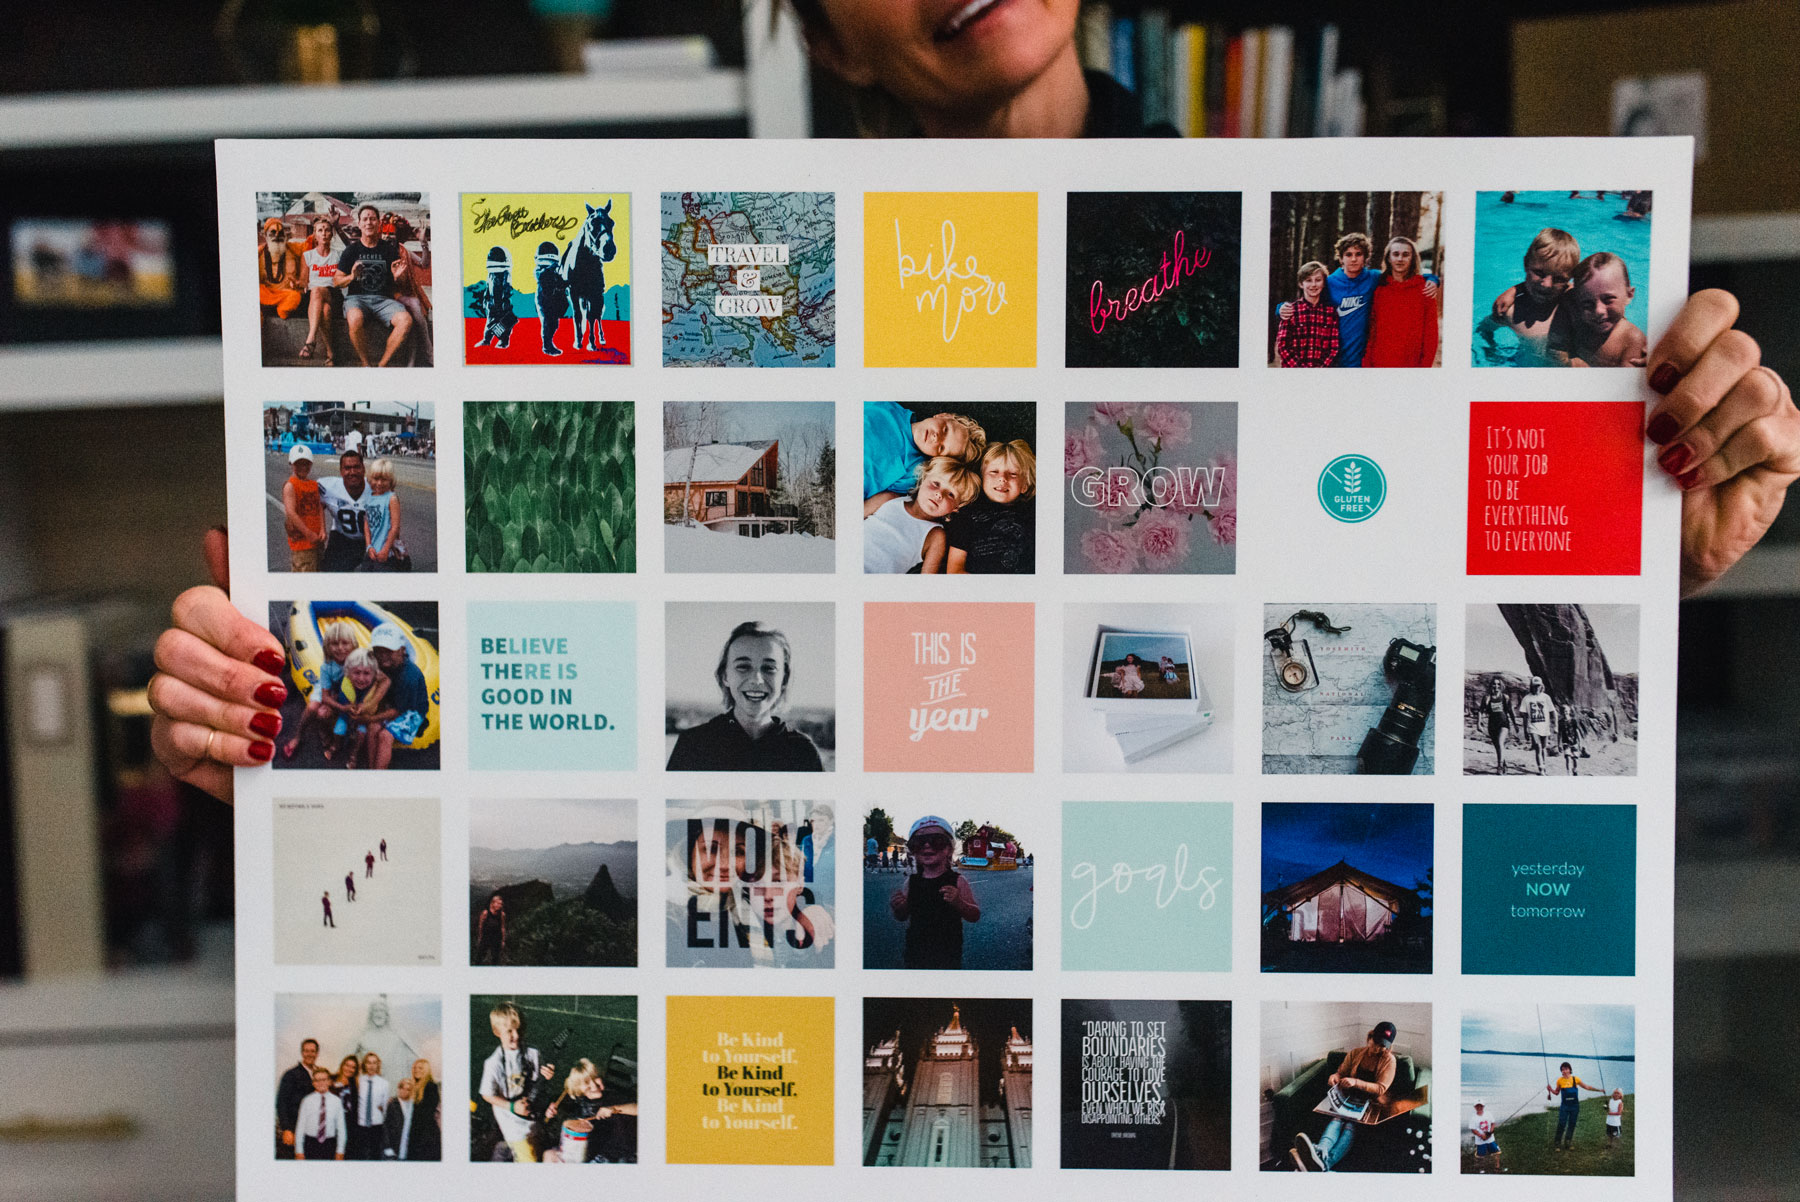
3 Steps to creating a vision board that works
- Organize & Upload Photos
- Drop into Photo Placeholders
- Hang the Vision! (where you’ll see it each day)
the mess-free digital collage
60 Free affirmations
All 60 affirmations are available in our online software for free!
Choose the quotes that work for you and simply add them to your digital vision board collage.
The 18×24 Collage Print uses 35 images and the 24×36 Collage needs 60. All collage templates are customizable (add or remove photo placeholders, text, background color, etc).
Upload images to your online Persnickety Prints account.
Tip: keep your Persnickety albums organized by naming folders (ie “Vision Board”)
Don’t forget that you can do this right from your mobile device, no app needed! Get started right in your phone or tablet browser. I personally upload my phone photos from my phone, and then login on my desktop computer to finish it up. Our system will save your projects in the cloud.
Simply drop a photo one at a time into each square. This shouldn’t take longer than five minutes. Add heat press mounting for an extra unique finish & then checkout!
Your vision board will arrive within one week!