Displaying photo prints at a wedding is the ultimate personal touch. When planning a wedding, your goal is to create an event that honors the couple and their love. It can be through smaller details like picking a font used in a wedding invitation’s design, to choices with big impact like the venue. Most couples want an event that reflects their style and story. But a space needs more than flowers and lights to truly feel like you – that’s where photos come in. Displaying photos at a wedding is a simple yet deeply personal way to transform your venue and celebrate the couple’s love story across rehearsal dinners, ceremonies, and receptions.
Over the past 10 years, we have had the opportunity to help hundreds of couples across the nation design photo print displays for their wedding. This ranges from giving advice on which photos to print, to sharing our favorite creative display ideas. However one of the most crucial aspects is also the most fundamental: how to design a photo display to fit your venue. Most venues don’t allow nails, command strips, or glue dots on their walls, and these limits commonly stump couples. We’ve taken the time to compile our four most common tips for designing photo displays, and included multiple factors like location, sizes, print types, and typical solutions for event spaces.
Consider Scale when Designing a Photo Display
Designing a display requires you to think in three dimensions: width, height, and depth. A common mistake couples will make is not factoring in one of these dimensions, when designing their decorations. The end result is a presentation that features your beautiful photos, but feels a little incomplete because it’s not at the correct scale.
Create a Focal Point with Tall Photo Displays
A fundamental step to designing a space is deciding where you want guest’s eyes to land when they first walk in. This is called a focal point! The easiest way to create a focal point in a space is to utilize height. We recommend selecting a height that ideally goes up ⅔ of the wall. If you have a venue with 8-10 ft ceiling heights or are gathering outside, going at least 7 feet will help draw your guests’ eyes upward, and help your space feel bigger. For spaces with really tall heights, we recommend at least 9-10 feet so it is an appropriate scale to the space. Having this element of height will add balance to the design of your space, and make a great first impression.
These displays thrive as statement pieces behind the head table, or even alongside narrow walkways leading into major areas like dance floors or buffets.
Photo Wall Collage
Let’s be honest: walking into a room and seeing the entire wall come alive with fond memories is second to none. A photo wall collage is big, bold, and brimming with personality—perfect for couples who want guests to feel immersed in their story from the moment they arrive.
The beauty of a collage lies in its wow factor. It’s visually striking, easy to set up, and a fun way to showcase a variety of snapshots, from silly candids to heartfelt portraits. Arrange the photos in rows, clusters, or playful patterns depending on your vibe. Use blue tape or decorative washi tape for easy setup and clean removal. If your venue doesn’t allow adhesives, pre-assemble your collage wall on a plastic sheet, piece of wood, or fabric backdrop and hang from a free-standing display.
Size: For easy viewing and assembly, we recommend selecting prints that are at least 8×8 inches. Our Photo Wall Collage Kit includes one hundred 8.5×11 prints, ideal for filling large spaces up to 450 sq feet without blowing your budget. For a square option, our 12×12 photographic prints, only $1.99 ea, are also a great way to quickly cover a lot of space.


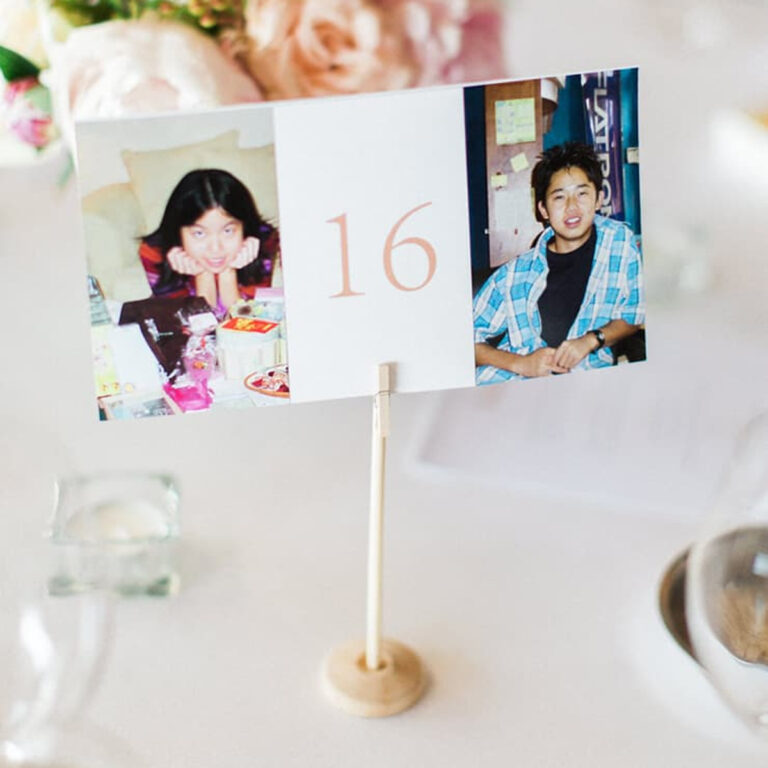
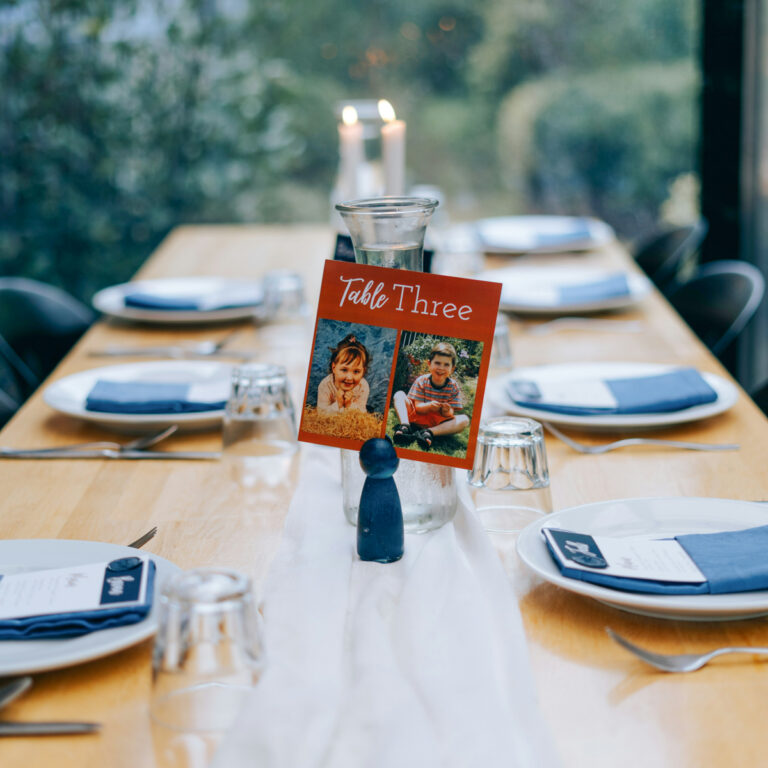
Photo-Based Table Numbers
Your table numbers don’t have to be boring. In fact, turning them into personal photo moments is a cute, effortless way to bring personality to every single table.
Instead of a plain design, include a favorite photo alongside your table number. When they are printed on sturdy card stock as press prints, your table numbers are able to stand up and be easily viewed. Every guest can gets a little glimpse of your story before sitting down—it’s a thoughtful way to weave memories into every thread of your big day.
Size: These table numbers are typically 5×7 or 6×8, to allow the numbers to be easily viewed.
Pinned Photo Boards
The beauty of a photo board lies in how it combines photographs with dimension and texture, turning simple images into a tactile, interactive display. To create your own, you can use cork boards, foam boards, or even quilted backdrops. Each option adds its own flair—cork boards give that retro textured feel, foam boards are sleek and modern, and quilted ones bring a hint of softness and whimsy.
These boards are perfect for escort card tables where guests can find their seating in a visually engaging way. Or use them as backdrops for special moments—think behind the couple’s table or alongside a cake display. They also make for thoughtful highlights at memory tribute tables honoring family history.
Size: Pair with smaller-sized prints (think 4×6 to 6×8), and don’t be afraid to get creative by pinning handwritten notes, small keepsakes, or colorful ribbons alongside your photos. For a bit of fun, add mini décor pieces—maybe vintage keys, tiny flowers, or even old postcards from meaningful places.


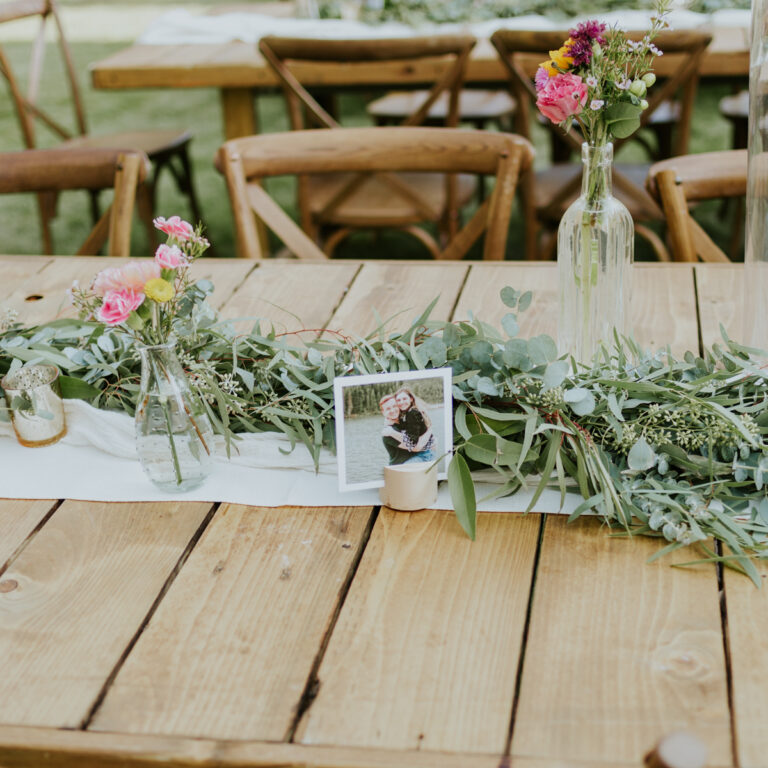
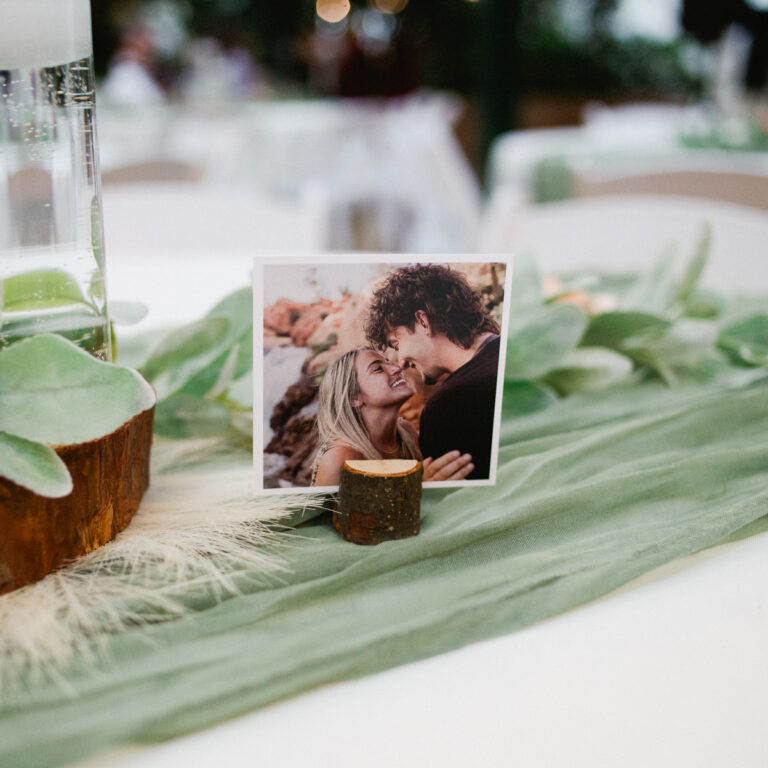
Wood Photo Stands
With their natural, minimalist look, wood photo stands lend themselves perfectly to modern weddings or events centered around thoughtful, clean designs. These stands act as little anchors on your tables or shelves, gently drawing the eye without overpowering the space.
To maximize the effect, print photos as press prints, or mount them onto a piece of thicker cardstock for extra durability. The texture of press paper adds richness, while cardstock ensures your prints stand tall and don’t warp over time.
Size: These stands are good for mid-sized photos—think 5×7 or 6×8 prints. Anything larger tends to feel a bit cumbersome, and anything smaller risks getting lost in the mix.
Add Visual Texture with Layered Photo Displays
A successful photo display at a wedding isn’t just about how wide or tall it is—it’s about the layers you create. Varying heights and depths in a display adds intention, and playing with dimension is key to well-designed wedding decor.
Since these displays require space to add in multiple layers of frames, stands, etc, they are best suited for areas of the venue at least 6 feet wide. Most tables are at least 30 inches wide, and guests will need at least 48 inches of clearance to comfortably pass by. These displays shine in wider walkways, open walls, or open corners where people will be mingling and can take in the different details. Can be perfect accents for bar counters, lounge seating, favor tables, or areas where guests will naturally gather.
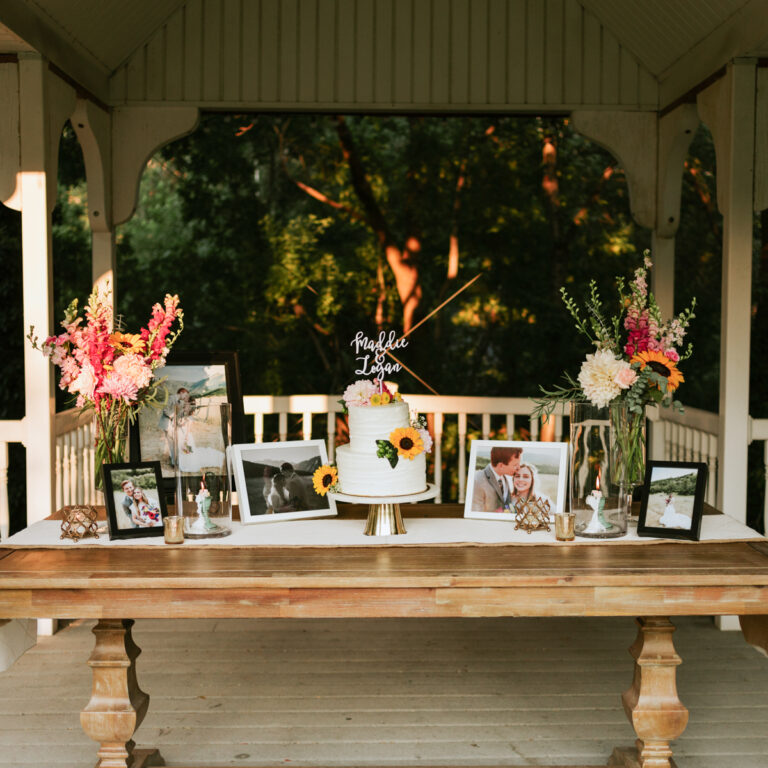
Framed Photos on Tables
Sometimes the simplest ideas pack the most sentimental punch, and a collection of framed photos on a table is proof of that. Quietly personal, this approach is all about the details—creating moments where guests can pause and connect with your story while waiting for their drinks, signing the guestbook, or simply taking in the ambiance.
Offset rows bring balance—play with staggering height and size to create visual flow. For multi-row displays, use risers or boxes hidden beneath table linens to elevate select frames for a polished, layered look.
Size: For intimate displays, medium frames (5×7 or 8×10) are ideal—they fit comfortably without overpowering smaller tables.
Larger photos (16×20 and up) add grandeur for focal tables like the gift station or cake area. If using anything taller, opt for a low floor easel to complement the display without cluttering the tabletop.
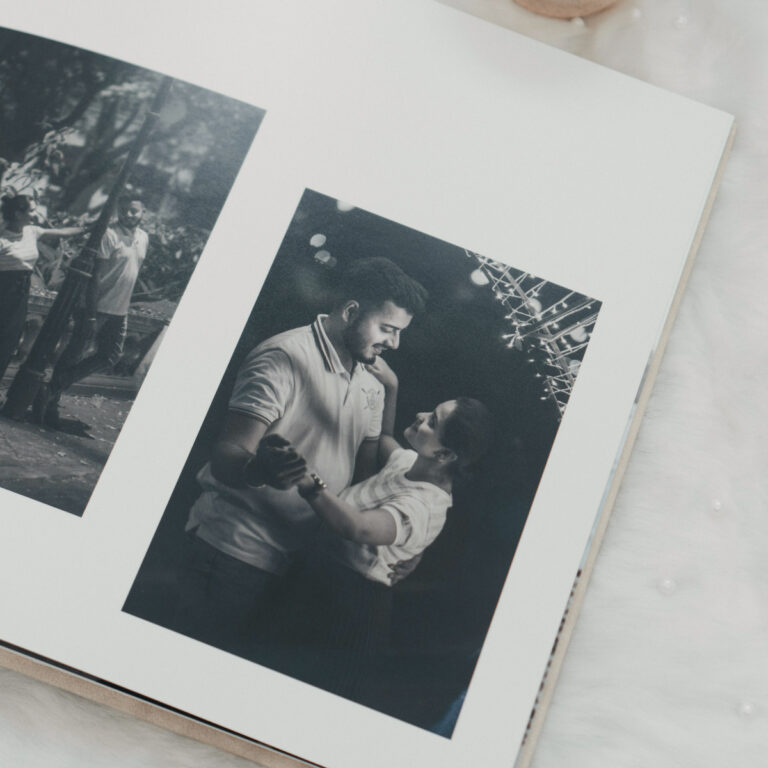
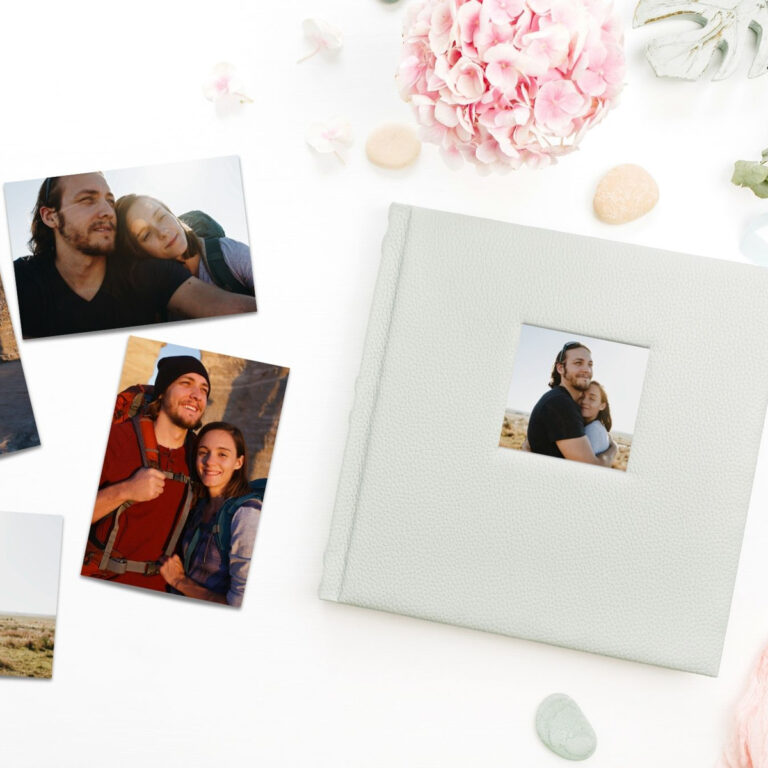
Open Photo Albums
Nothing beats the nostalgia of a physical photo album. Watching your guests flip through the memories is a quiet reminder of how far you’ve come together, and allows a beautiful moment for introspection and reminiscing.
Consider tagging special pages with stories or little notes. To further encourage them to flip through the pages, add a nearby sign encouraging guests to take a peek. It might even spark conversations you’ll treasure later.
Size: albums typically range from 12×12 to as small as 4×6 photo flip books. Place them on top of tables that allow albums to be fully open, and have 4 inches of clearance from the edge to comfortably view. Place them in an area guests naturally linger—it’s all about ensuring your memories are experienced fully, not just glanced at.
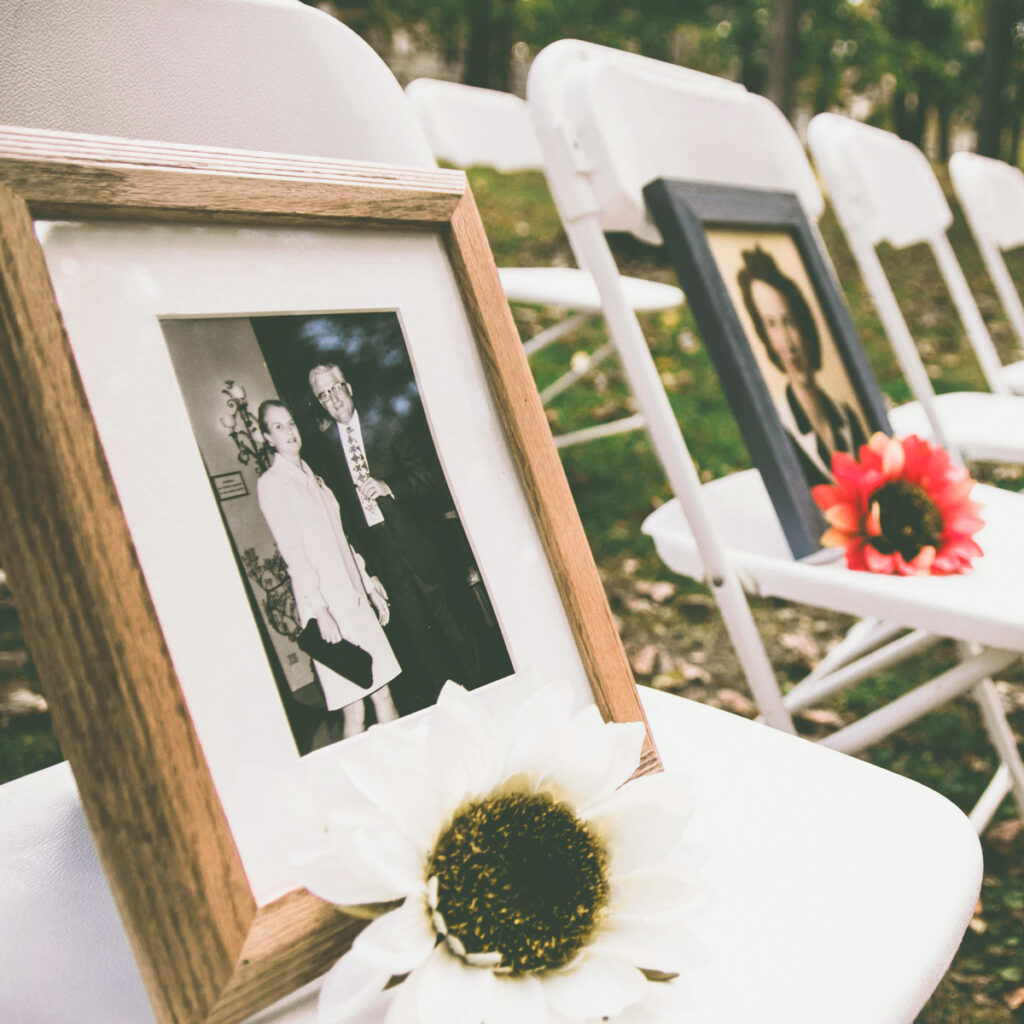
Photos Hung on Chairs
A subtle way of incorporating photos in a wedding is adding them to the chairs! Adding them to the sides of chairs so they line an aisle has become a popular option for ceremonies. It is a subtle way to show the journey of the couple, and their progression to the people they are today. Placing photos on the front of chairs at the ceremony is also a classic option for honoring those who have passed on, but whose relationships are important to the couple. The presence of these photos can be comforting to the couples, and help guests to know of those who are attending in spirit.
At the reception, hanging photos from the back of chairs at the sweethearts table is another charming way to show milestones or moments that are important to the couple. These thoughtful displays offer both decoration and storytelling, and blend sentiment with style.
Size: recommend at least a 8×10 if displayed on the front or back of the chair, or a 5×7-6×8 for display along the side of a chair.

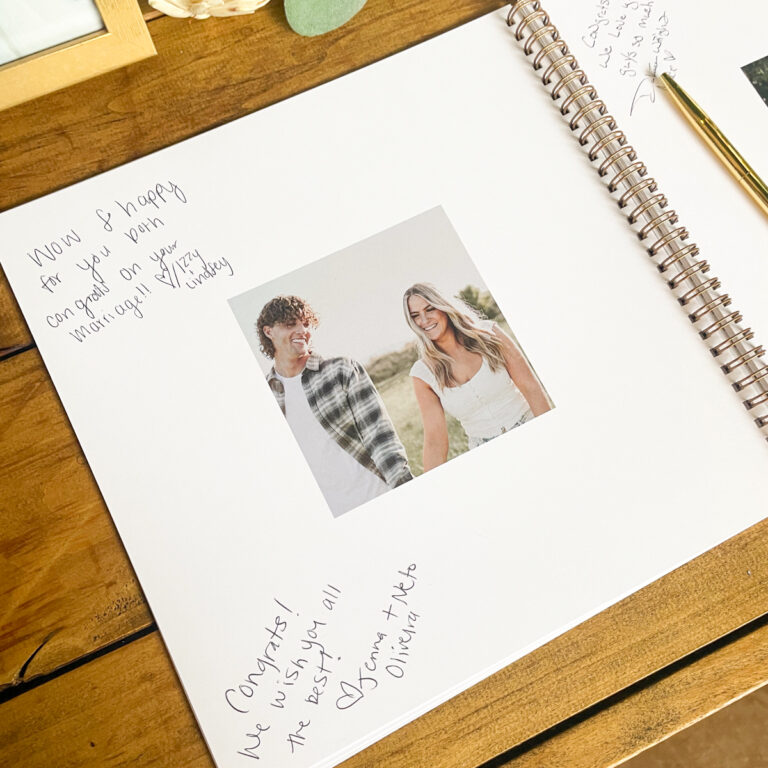
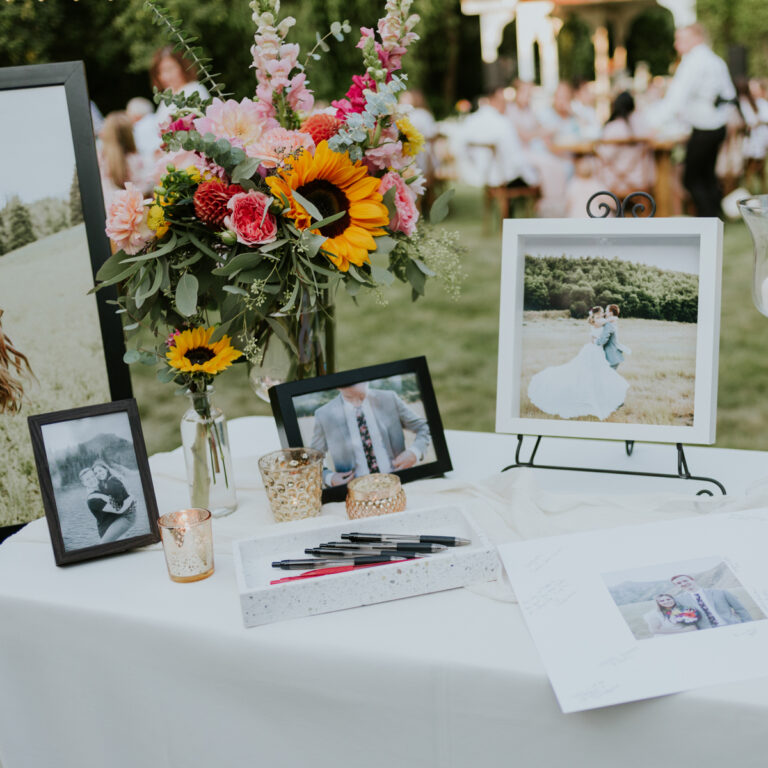
Custom Guest Book With Photos
You deserve a guest book that’s as unique and memorable as your wedding. Our custom guest books are designed to be cherished keepsakes, capturing the essence of your special day.
Our guest books have a premium wire binding that allows the pages to lay flat, which makes it easy for your guests to write on. Each page includes space for photos and lots of room for heartfelt messages. Your guests can share their thoughts, memories, and well-wishes in a meaningful way.
Sizes: Starting at 8×8 in and going up to 12×12 in, our books make a striking impact. Whether you want something intimate or grand, we’ve got you covered.
Place your guest book right by the entrance so it’s the first thing people see. Add a mounted photo or two nearby to draw guests in and get them excited to leave their mark. It turns a simple act into a moment of connection and reflection.
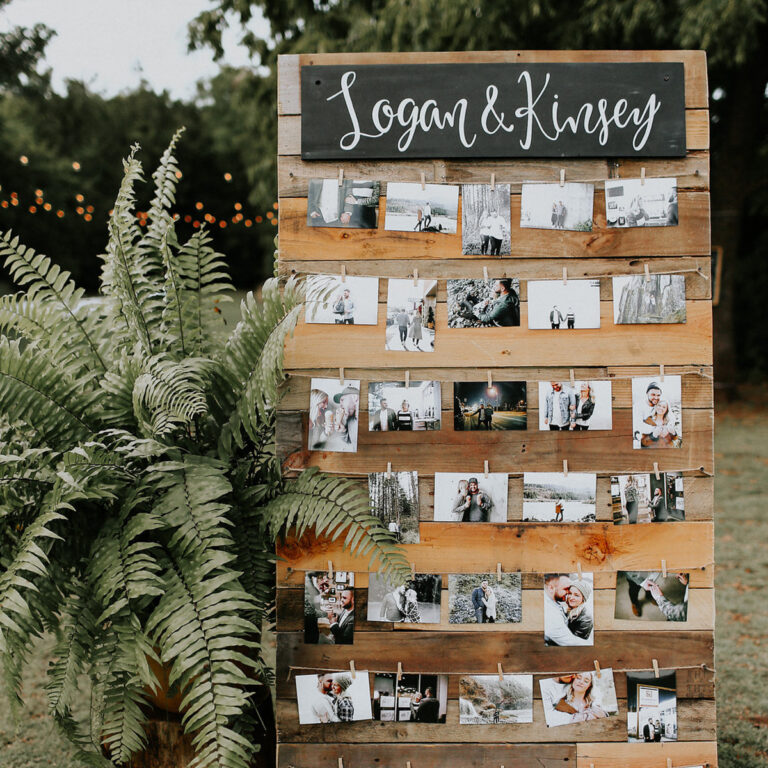
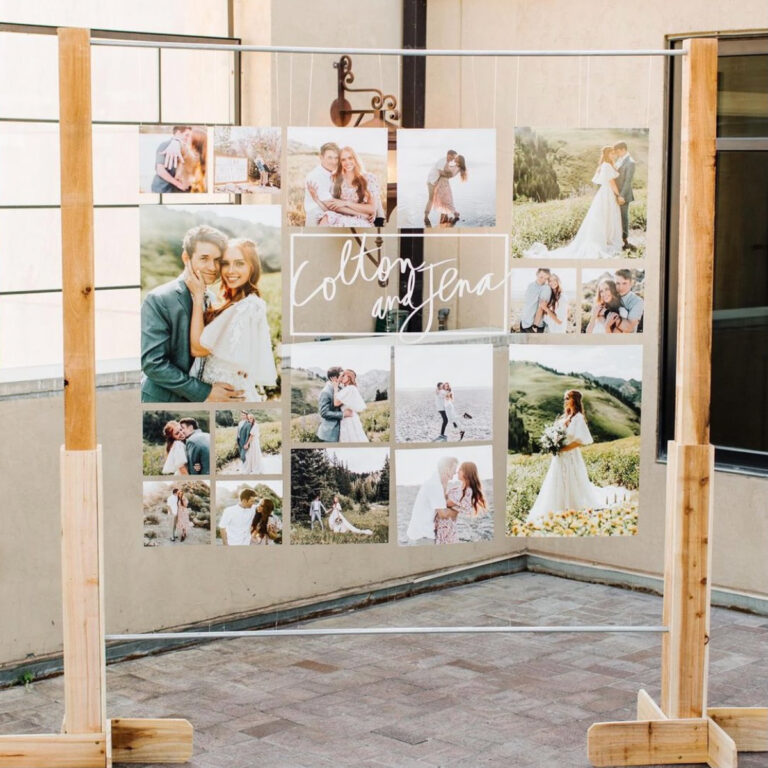
Fill Empty Walls with Wide Photo Displays
Sometimes the most unassuming places in a venue can become a favorite design feature all your guests will love. Take advantage of narrow walkways, and share your story! We recommend a display that takes up at least half of the width of the space, ideally two-thirds. When centered, it will leave enough breathing room around the sides, yet help it to feel full.
These wide displays are also great for defining areas and boundaries in outside areas, and look incredible when draped between outdoor trees. They create a cozy, intimate atmosphere where every photo tells a story. This setup encourages people to pause, look, and connect over shared experiences.
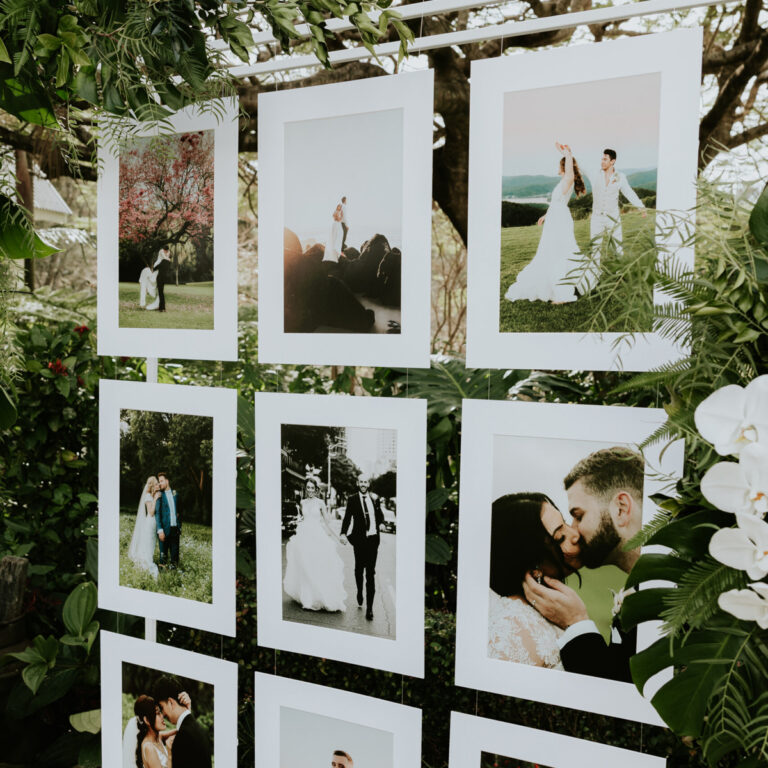
Hanging Gallery Wall
If your event space is more traditional, it likely has built-in picture rails or hooks. These are a dream for creating seamless installations! And if the walls are off-limits, consider hanging framed photos from the ceiling instead. Venues typically allow ceiling decorations, and may have pre-installed hooks you can use. We’ve had great luck using a creative combination of plumber’s chain and S hooks for a historic yet industrial look.
One of the best-kept secrets for achieving that high-end gallery vibe on a budget? Vintage frames. You can find some real gems at thrift stores, often at a fraction of the price. And for those unconventional frame dimensions – we’ve got you covered. To print your custom-sized photo, select the next largest size up and request the specific measurements in your order’s special instructions at check out.
Size: typically the smallest size of photos included in gallery walls is 8×10. If you want to go smaller, or incorporate some extra-wide mats, just make sure the couple’s faces will end up at least 2 inches tall. If you want to make sure that grandma can easily see your photo from a foot away, having faces be at least 5 inches is best.
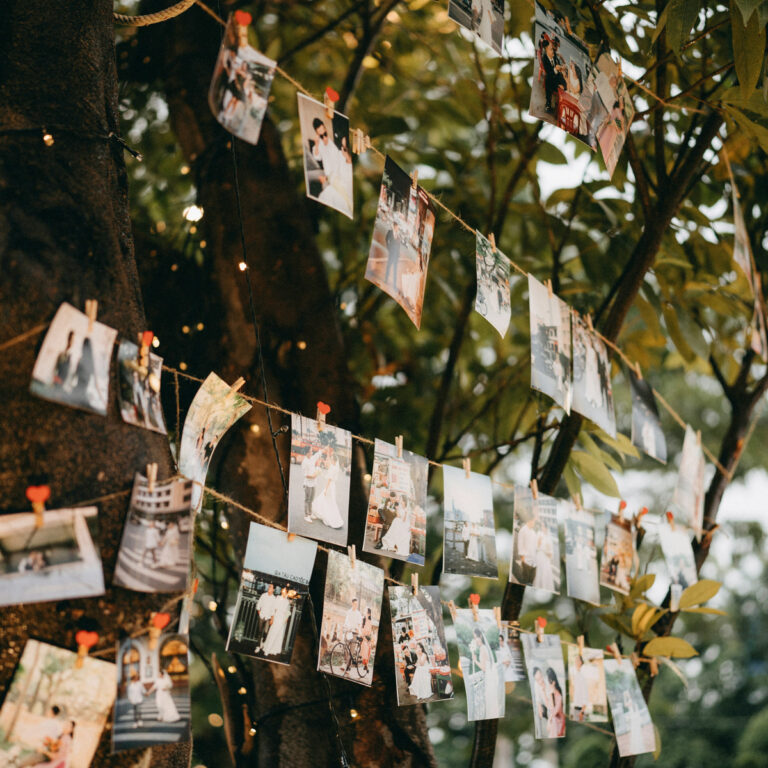
Strung Photo Displays
There’s something whimsically charming about strung photo displays. They can adapt to the dimensions of any space, are easy to assemble, and bring a sense of nostalgia and warmth. To preserve your prints, attach them to the string with small clothespins or for a collage look, string a larger piece of paper you can tape the photo to.
When looking at your space, evaluate where you can hang the string from. When filling in a wider space, it is best to try to create rows at least 8 inches wide with the string. Ideally you can wrap the string around poles, or use free standing posts.
Tip: No one wants a droopy string! To increase the friction between the string and the post, choose a string with texture, pull the string tight. To keep the spacing even between your rows, add tape or mini command hooks to the back of your posts. For an adhesive free option, you can also wrap the string a few times around the pole, adding an inch or two between the loops, before starting your next row.
Size: we recommend using at least 5×7 and 6×8 for the best visibility from a foot away. If guests can get up close to see the details, prints could be as small as 4×6.
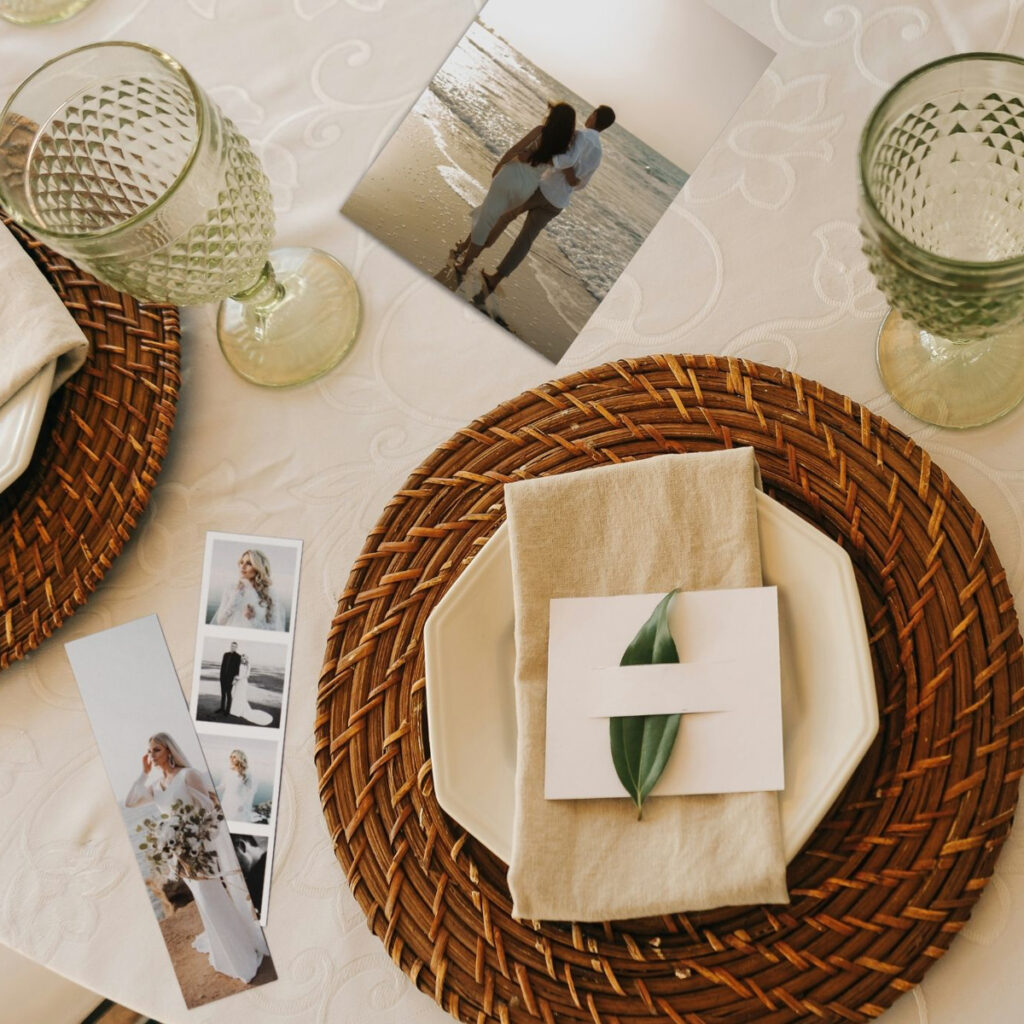
Loose Photos (Table Scatter)
Loose photos scattered across your event tables are a delightful, interactive touch. They invite guests to engage with your decorations and pick them up. So often with table displays or centerpieces, designs incorporate height but don’t adjust for width. These prints are affordable flat lay table accents that add to the width and depth of a display, without being cumbersome or taking up a lot of space.
Add a little flair to your prints by printing them with a creative design, like our retro prints, mini press prints, and photo strips. When ordering, you can easily add text to give context and tell a story, or leave as-is for a clean look with the white borders.
Sizes: Opt for smaller options like 3×3, 3.5×5, 4×4, or our classic 2×6 photo strips. They’re perfect for scattering and easy for guests to handle.
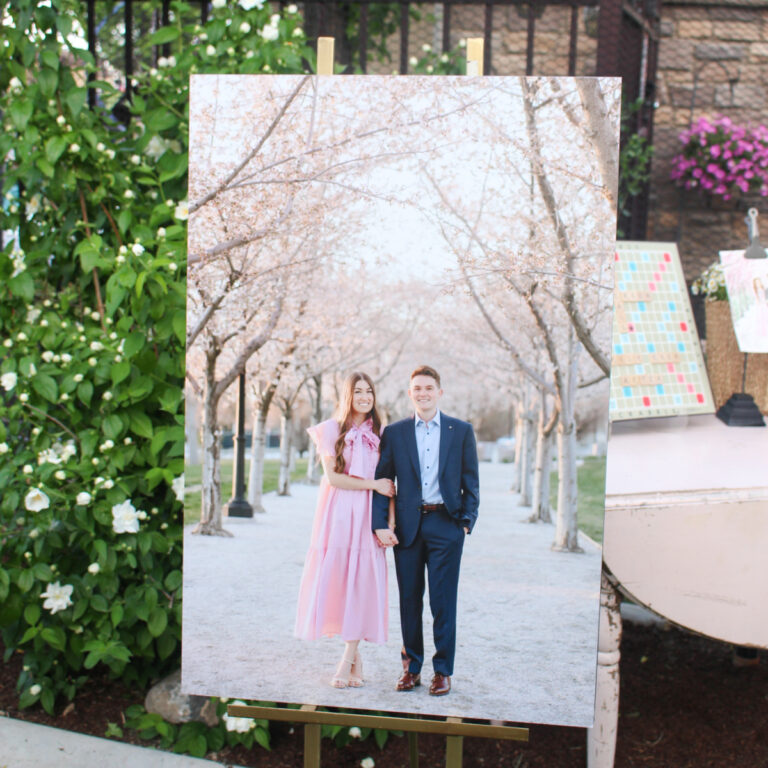
Make a Big Impact with Large Photo Displays
For every wedding, we recommend having at least one display that incorporates all 3 dimensions for a stunning, eye-catching design. They are perfect in vertical spaces or walkways where you want to inject drama. Use them to define a welcome area, or brighten up empty walls. Place them in areas with no other competing visual interest, and let your love shine!
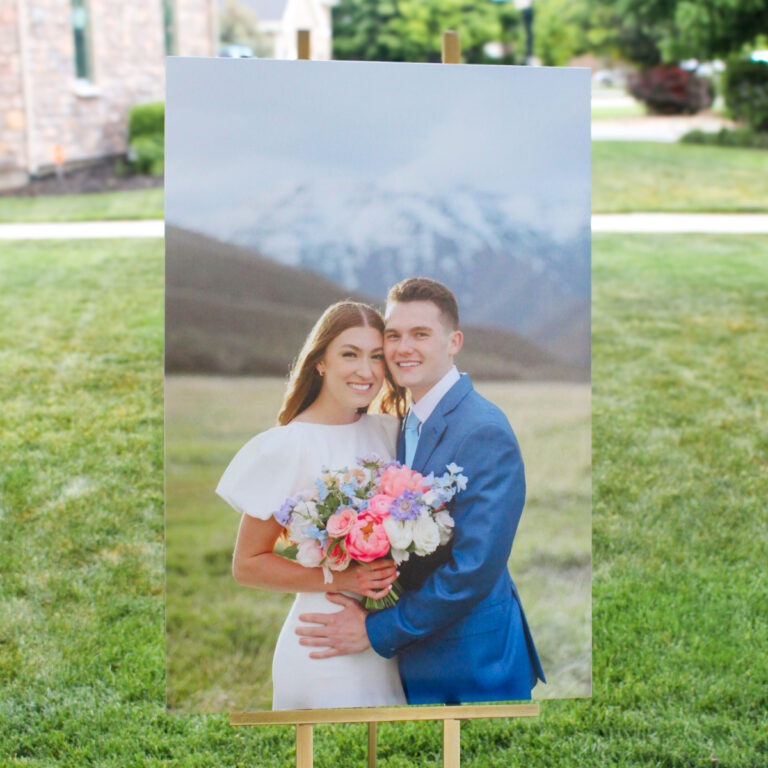
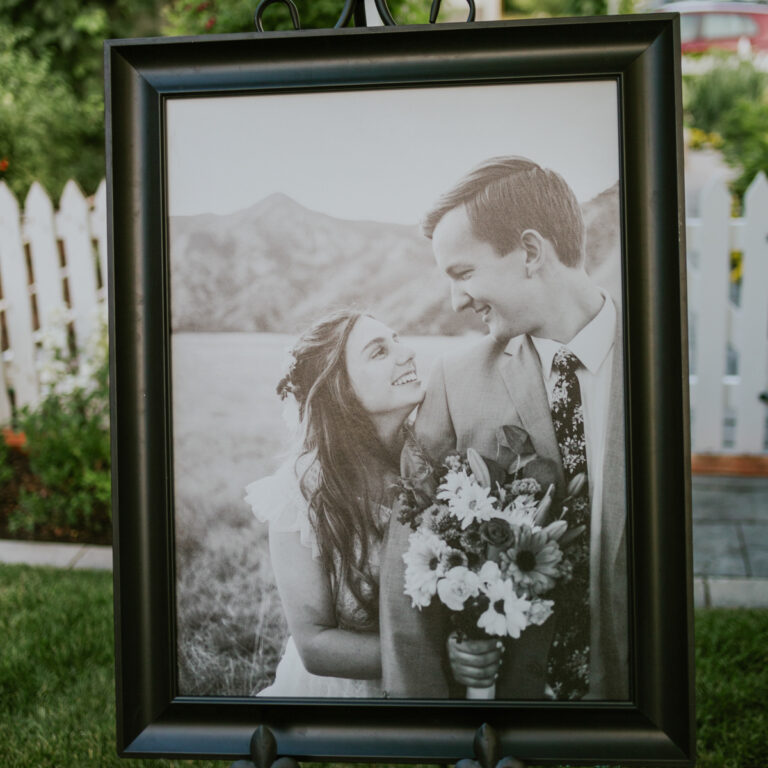
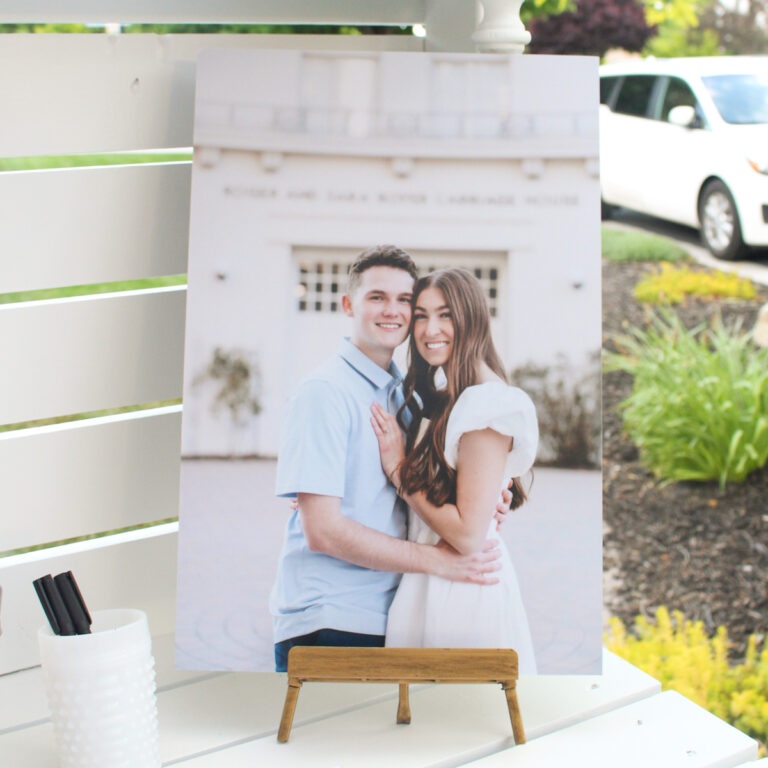
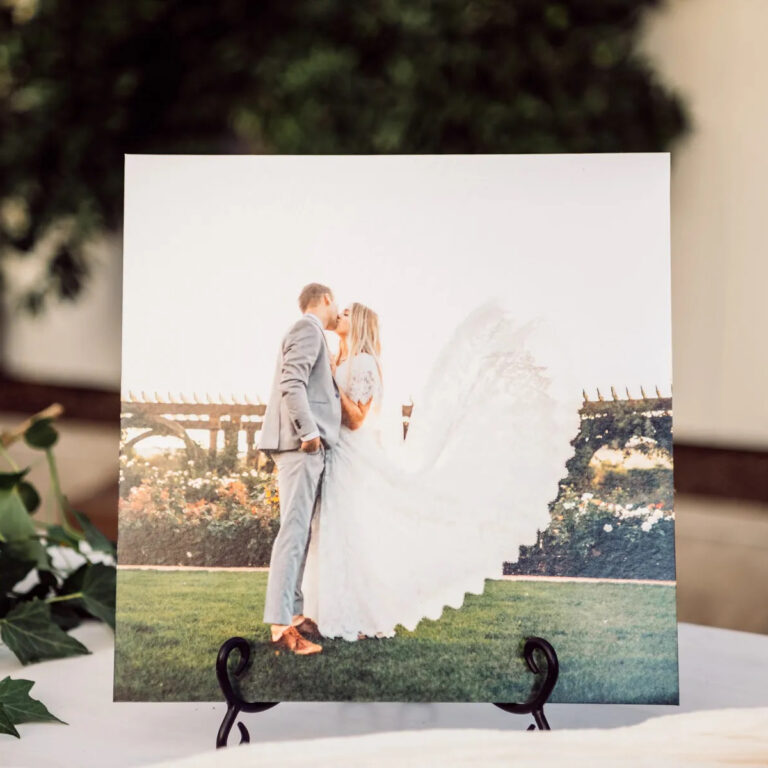
Mounted Photo Print on a Standing Easel
There’s something effortlessly timeless about a mounted photo print displayed on an easel. It’s simple and clean, but still makes a statement. And because it only requires an easel, it’s one of the easiest ways to showcase a large, eye-catching image.
For a clean, modern look, we recommend our heat-pressed mounted prints on black foam board. The mounting adds structure to your photo, and the laminated finish protects the prints from scratches, smudges, or wandering fingerprints. Mounted photo prints can be displayed as-is, or can be popped into a glassless frame for a more formal look.
Finding a sturdy standing easel is easier than you think. Most venues or event rental services offer classic adjustable-tripod styles that look great and blend seamlessly into any setup. If your venue doesn’t have any available, there are many options under $100 on amazon or people renting out easels they used for their own weddings on local online marketplaces.
Size: This is largely based on the type of easel you choose. Most standing easels are offered with either mid-height display bars, hitting 2.5-3 ft from the ground, or low display bars that are close to the ground.
As a rule of thumb, at least two thirds of the print’s height should be supported by the easel. For mid-height bars, go with a 20×30, portrait and landscape, or 24×36 print in a landscape orientation. These sizes are still big enough to impress, but are adequately supported by the easel. If the bar sits closer to the ground, don’t be afraid to size up to a striking 30×40 print for maximum impact. Mounted easels shine in key focal areas like the venue entrance, alongside the cake table, next to the favor station, or even near the guestbook area.
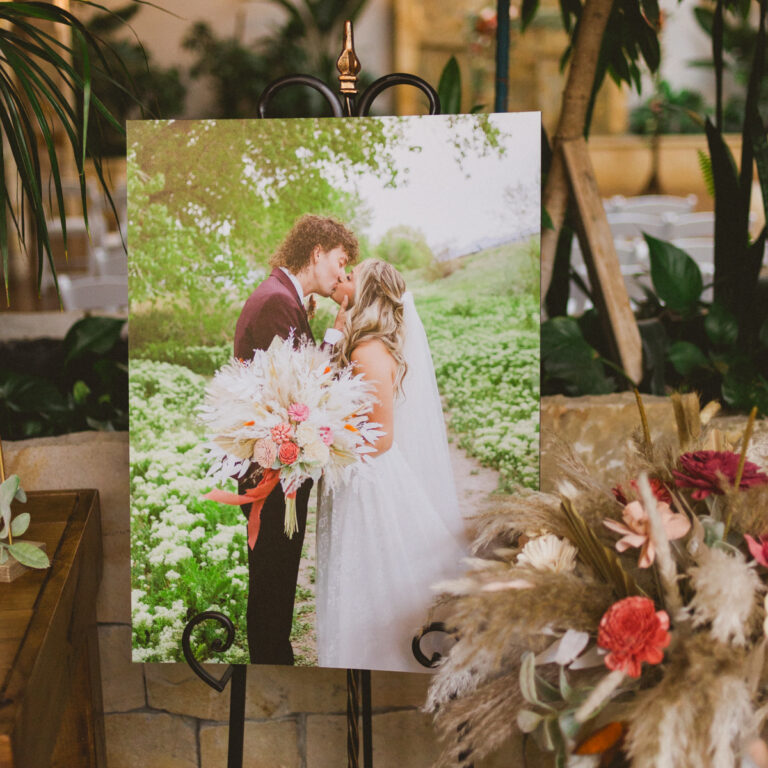
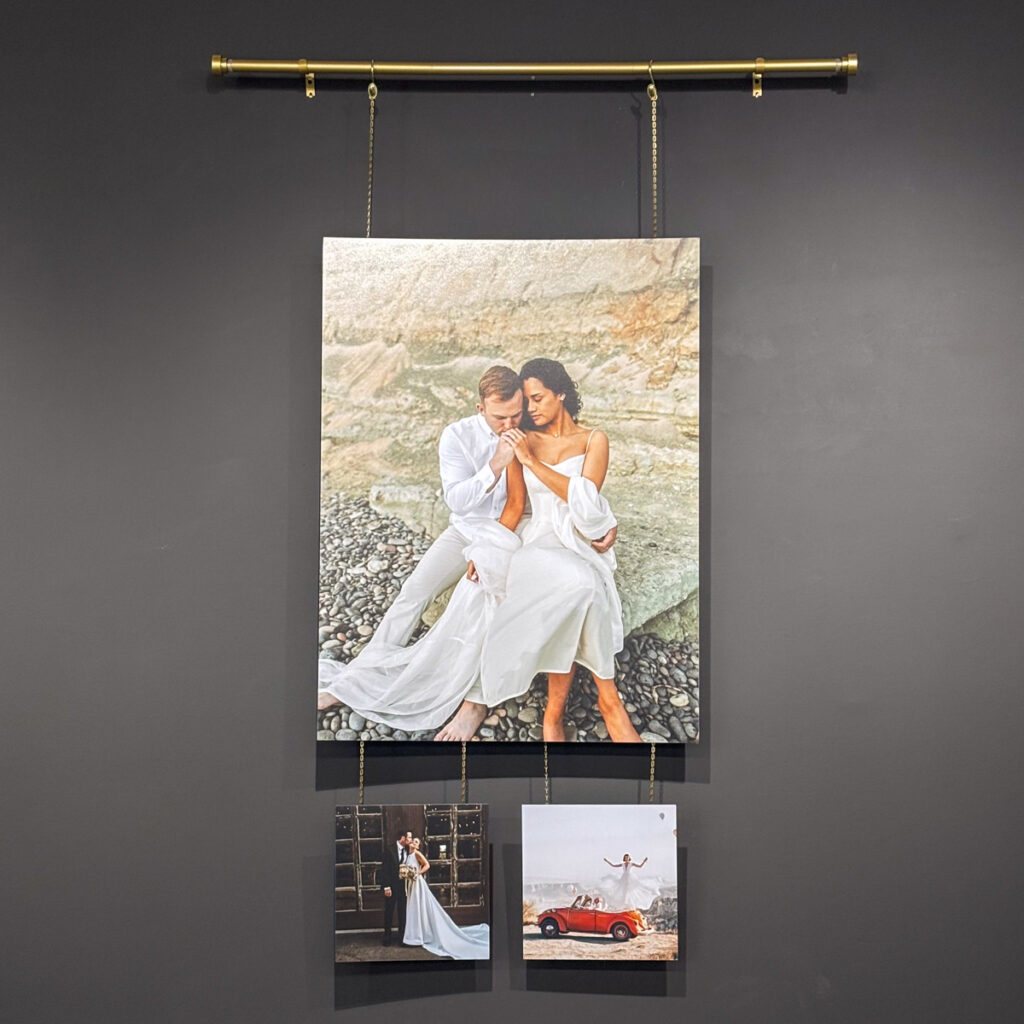
Hanging Large Prints From a Standing Display
There’s a good reason hanging prints have taken Pinterest by storm—they’re bold, artistic, and utterly customizable, amplifying your wedding’s personality with minimal effort. These displays can vary from the simple, or as customized as you wish.
At the core, all of these displays involve a mounted print being hung from a free standing display. This can be quickly done by adhering a photo print to a thicker piece of card stock, or ordering larger photos with heat press mounting. To punch a clean hole through a foam board mounted print, we recommend scoring a hole on the front, and reinforcing the back with tape before making the punch. The thinner the backing, the easier it will be! Our heat press mounted prints are adhered to a black 3/16 in foam board, and we have been able to replicate this look with a common grommet tool.
Some easier stands to use are photo booth backdrops, painted PVC pipe, or copper plumbing pipe for a trendy, industrial aesthetic. Thicker leather string, or woven twine are commonly used to hand the photos, and we love the idea of using wide ribbons to disguise clear fishing line for a romantic, whimsical touch.
Sizes:
- Solo images: Larger prints 20×30, 24×36, and 30×40 work best for single, show-stopping photos.
- Creative Collages: Mix it up! Combine sizes to create a dynamic series of floating photos. Since you want your photos to be easily visible from 2 feet away, we recommend the smallest size being 8×8 or 8×10.
- Uniform Gallery Style: If you prefer order over variety, stick with a consistent size. Having photos at least 12×18 creates an elegant rhythm without overwhelming the setup.
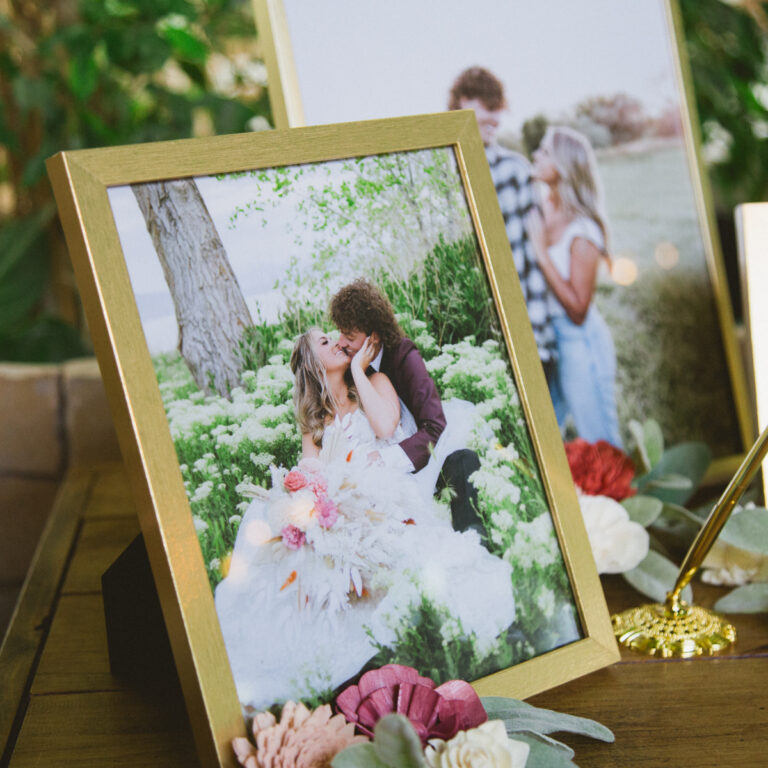
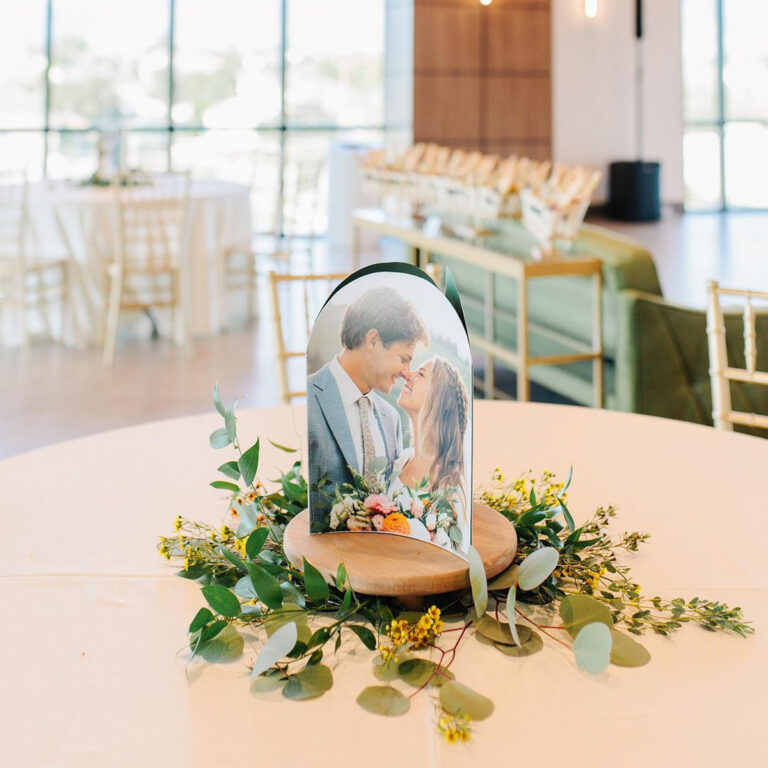
Statement Photo Centerpieces
Looking to showcase more photos? Use them as your main decor item in a centerpiece! Larger photos shine on dining tables, especially in smaller venues where space is at a premium and you may not be able to have an entire wall dedicated to a larger photo display. They provide a personal touch and an opportunity to see more photos from engagement or “first look” photo shoots.
Place them in a frame, or mount your photos to keep them upright and elegant. Easily pair them with beautiful florals or elegant risers to add height and dimension.
Size: Choose a maximum height of 12 inches so guests can still maintain a sight line above the centerpiece.

Bookshelves & Shelving Units
If your venue already has shelves built in, they’re practically begging to become part of the décor. A shelf can transform from a piece of furniture, into a window to your world. And if shelving isn’t readily available, don’t worry! You can get creative with rustic crates for a warm, cozy aesthetic or whip out some IKEA hacks for a polished yet budget-friendly vibe.
The possibilities are endless. You can display framed photos, mini albums, family souvenirs, or even themed pieces that tie into your event’s personality. For shelves, landscape prints are often your best bet. They offer dynamic lines that flow well with the horizontal structure.
Sizes: Opt for sizes ranging from 6×8 to 11×14 to strike that pleasing balance between bold and approachable.
Display Photos at a Wedding to Fill Open Spaces
The most common mistake when planning wedding decor is not planning enough items for your space. You chose a beautiful venue you love, and it is natural to want its architectural features to shine. However, the key to a well-designed space is its styling. That is why professional wedding planners will still spend dozens of hours preparing decorations for weddings with a minimalist aesthetic. It takes a surprising amount of items to help a space feel styled, even for a small event.
At a minimum, we recommend the following quantities and display sizes for common
- Small Spaces: 2–3 photo displays for intimate setups. Focus on quality over quantity here with a stand out moment and one or two meaningful touches.
- Medium Venues: For venues that hover around 2-3,000 square feet, aim for one large display (like a gallery wall), one or two mid-sized setups, and several smaller details scattered throughout. Variety is key!
- Large Celebrations: For sprawling venues or big gatherings, lean into multiple feature displays. Big spaces deserve big moments that catch the eye and draw the guests in.
Give Yourself Time to Be Creative
The best way to keep your cool when wedding planning is to give yourself enough time to adequately prepare. Things won’t always go perfectly (and that’s okay), so setting yourself up early will make the process feel fun and manageable. Here’s a suggested timeline to help keep you on track:
At Least 2 Months Before:
It all starts with getting familiar with your event space. Take a walk through—it doesn’t matter if you’re renting a venue, hosting in a backyard, or turning your living room into a celebration hub. A stroll through the space gives you a chance to think about where your photo displays will shine best.
Look for empty corners that might need sprucing up, or maybe there’s a blank wall begging for attention! Bonus points if you can snap pictures of your space and start brainstorming. Use your phone to sketch out rough ideas for displays or write notes about potential arrangements. Doing this early lets your creative energy flow without feeling rushed later on.
1.5 Months Before:
Now it’s time for the part that’s all about you: selecting the photos that matter the most. This is such an important piece of the puzzle, and we recommend giving yourself a full two weeks to sit down and go through your collection.
This also is the perfect time to implement HOW you will display your prints. How many standing easels will you need? Are you going to create a memory table highlighting your family’s generations of love? Nailing down these details will help you to know the quantity and sizes of photos you will need to order.
1 Month Before:
Once you’ve chosen the photos, you’re ready to order your prints. At Persnickety Prints, our products have 1-3 days of processing times. Ordering is one of those “set it and forget it” tasks that frees you up to focus on other details. Your photos will be printed, shipped, and on their way before you know it.
2 Weeks Before:
Now for the fun part: once your prints arrive, it’s trial-run time. Set everything up at home and play around with potential arrangements—it’s better to experiment here instead of waiting until the day-of.
Check spacing, colors, and overall presentation to make sure everything feels right. If you’re happy with the layout, snap a quick photo or video of the setup. This serves as a blueprint for anyone helping with event day preparations, whether it’s your wedding planner, a friend, or family members.
Last-Minute Advice & Solutions
If something pops up at the last minute—like waiting on formal photos from your photographer or needing an urgent reprint, we’re here with rush options to ensure you stay stress-free even when the timeline gets a little tight:
- Standard-sized prints (12×18 and smaller): These photos are already processed in just 1 business day, giving you the flexibility you need to stay on track.
- Larger photo prints and mounted prints: When adding these items to cart, these products will allow you to choose from 2 day or 1 day rush options so you can get them even quicker!
If you need something sooner, reach out to our team directly and ask about additional rush options and our available expedited shipping speeds.
For those local to our location in Orem, UT, we have in-store pickup options so you can stop by during your next day of errands. We want to make this process as seamless as possible because, truly, your event should be about celebrating—not stressing.
Find Homes for your Prints After the event
Last but not least- don’t be afraid to reuse your prints after the event! So many people think that these photo prints are for just a few days of celebration. With our archival print quality and timeless nature of your photos, there is sure to be a home for them afterwards!